No products
To be determined Shipping
0,00 zł Total
 en
en  pl en
pl enGluing and painting scale model cars – a tutorial
In this tutorial we will show you how to build and paint Jaguar XJ220 1:24 scale model step by step. Modeling cars is quite different than modeling AFV's or planes, as some of the techniques are absolutely unique for this branch of our hobby. Unfortunately, most guides and instructions attached to models doesn't demonstrate the most interesting of them. In this tutorial, you will find hints and most popular techniques used by experienced car modelers, which will help you bring out the best from your vehicle.
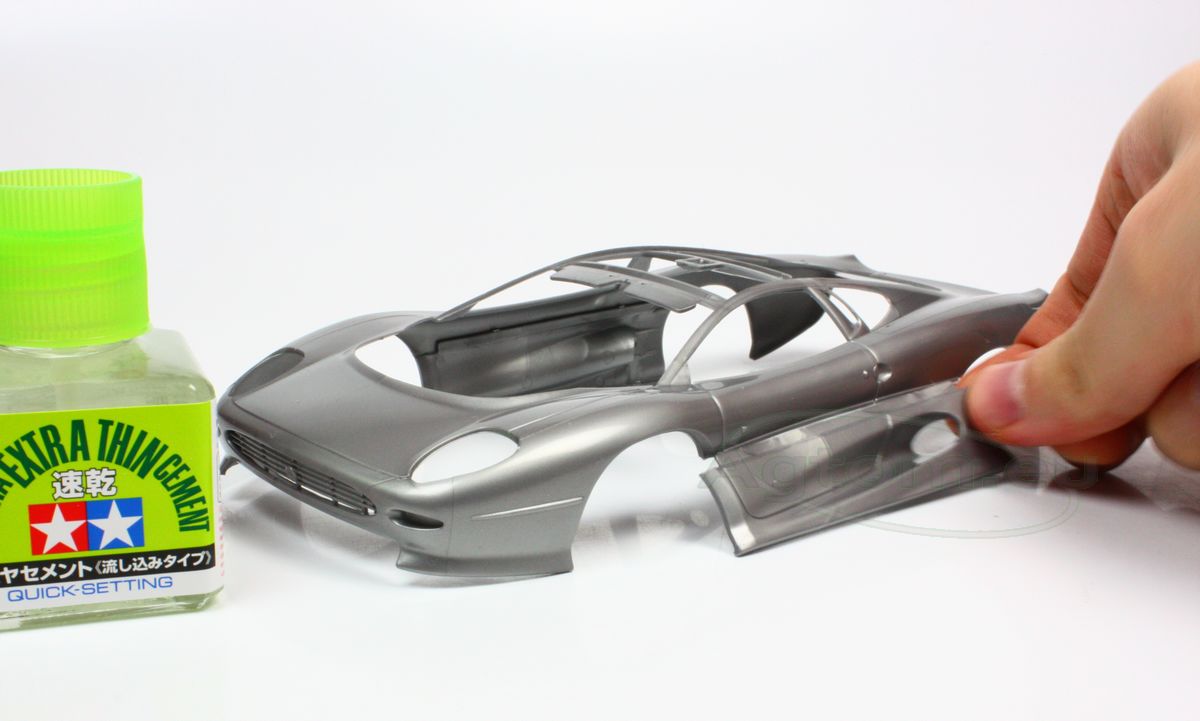
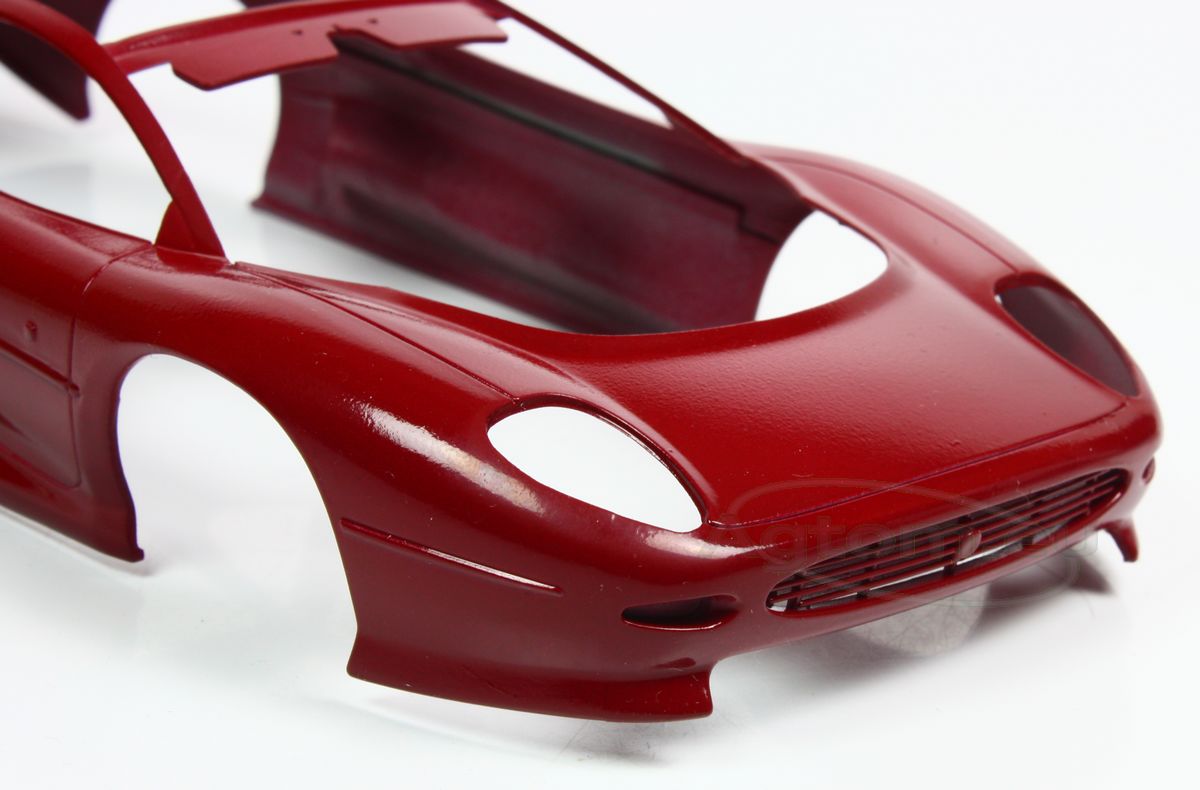
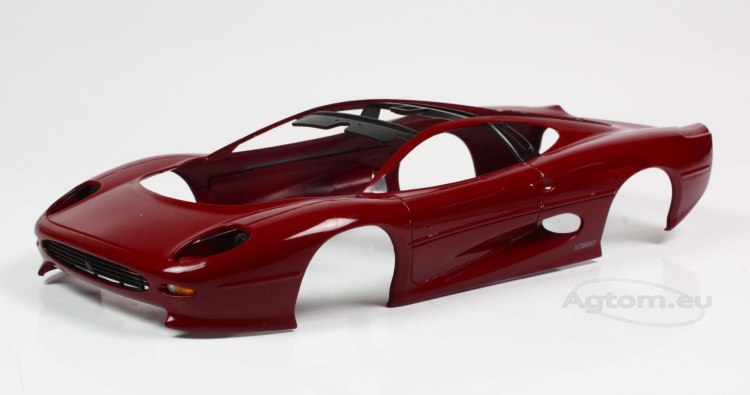
In the first place, we will make the body of our car. Usually, a body is made of one single element. In this kit, we need to attach side panels with air intakes.
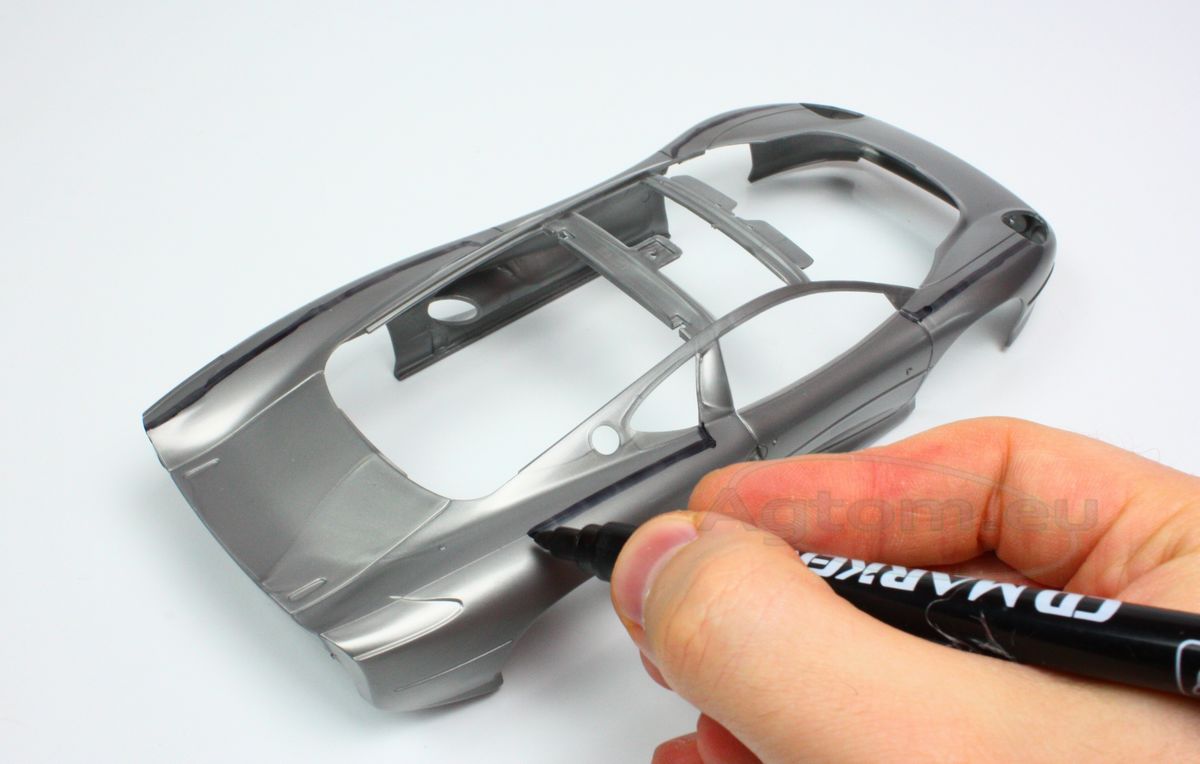
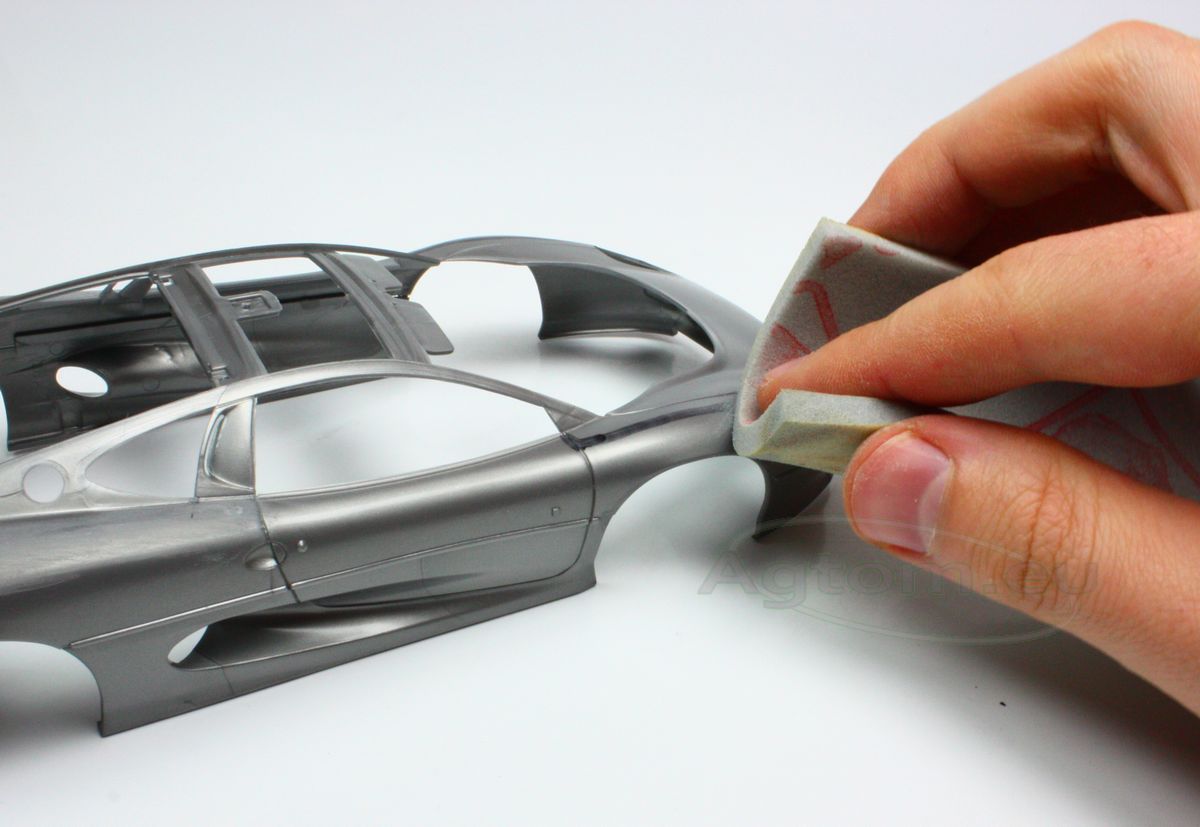
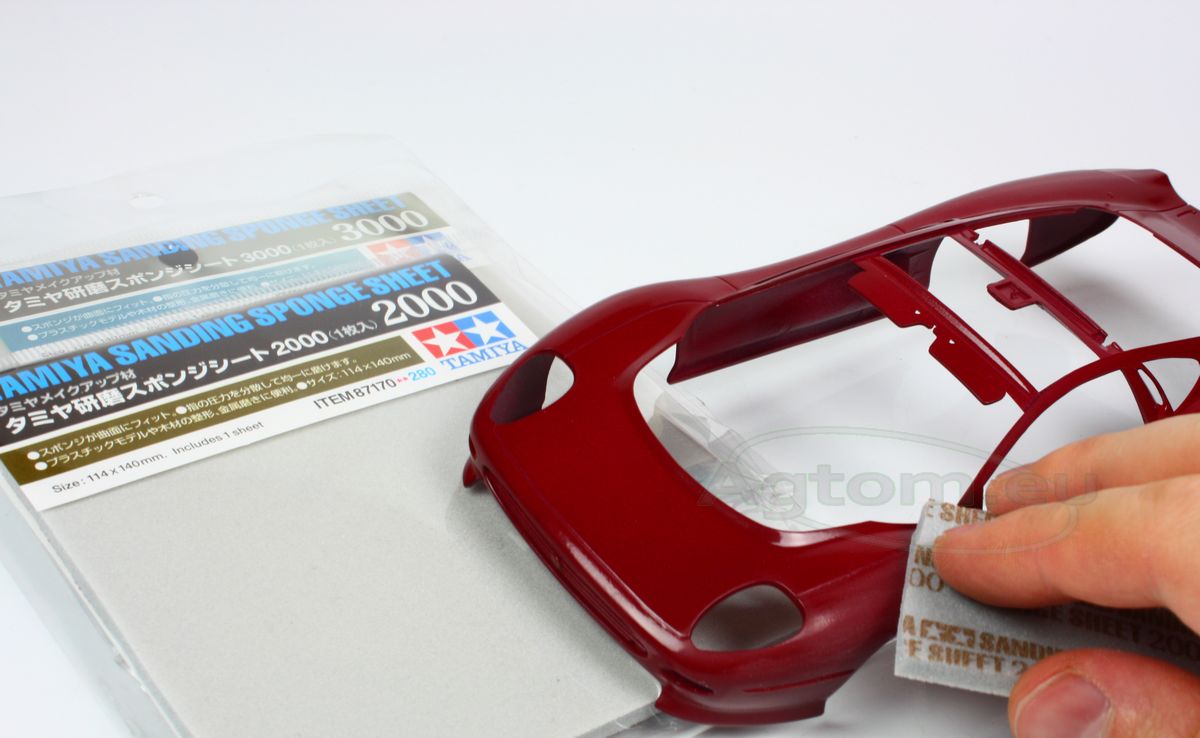
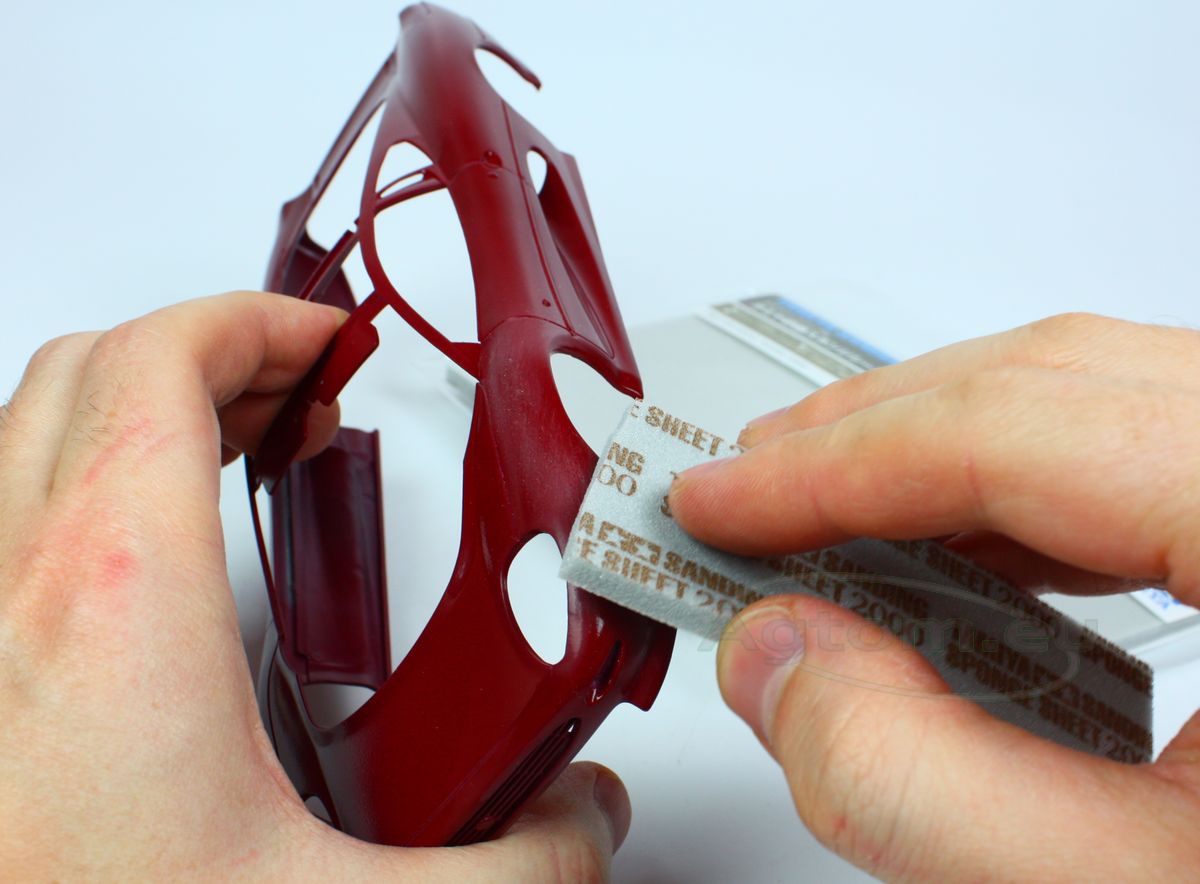
Next, we need to remove any mouldlines and imperfections. For facilitation, you can use a marker to mark any of those, which will help you during grinding.
Now, using a file or sanding sponge (240 abrasions would be best), remove any mouldlines, following marked surface. Cautiously grind until any mouldlines, imperfections, and marking is gone. In the end, smooth the surface with a sponge of higher abrasion (400 and/or 600).
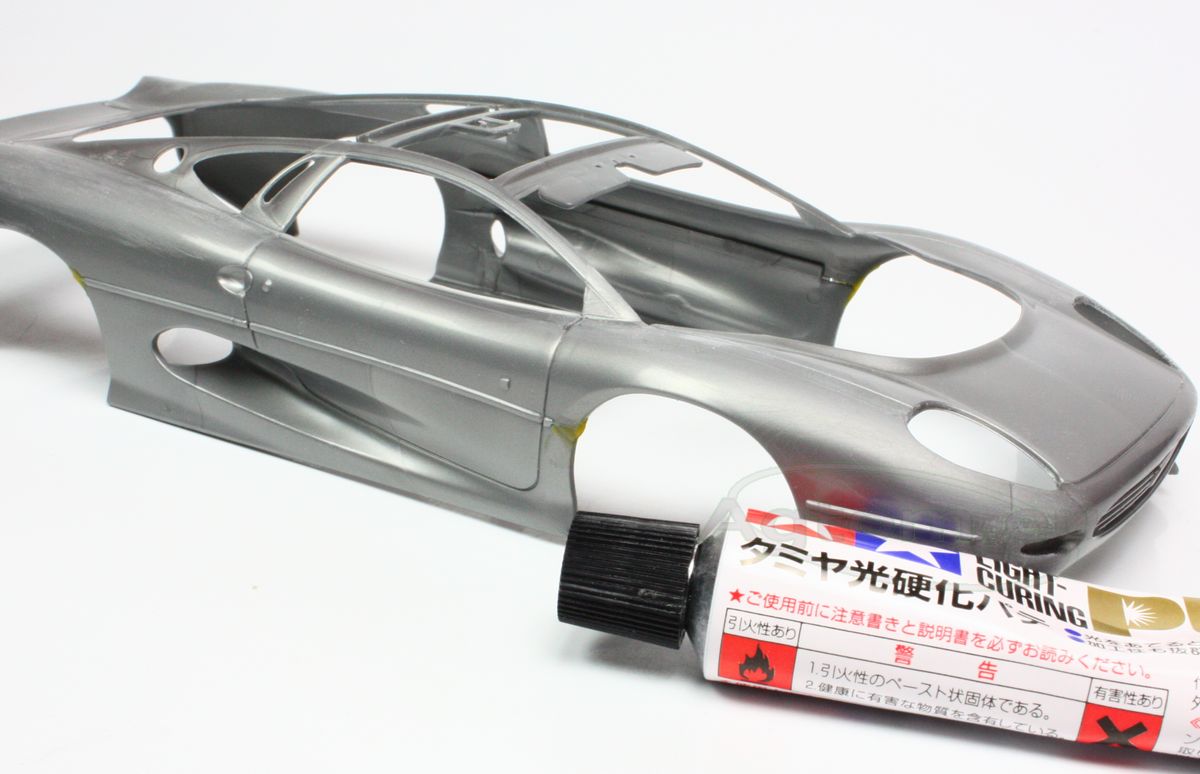
When body kit is smooth, search it for any imperfections and chinks, that will need filling. In our Jag, we need to fix cracks at the panel connections by the fenders. To fill in the gaps, we have used Tamiya Ligh Curing Putty. It's really great, as it stills in just a few seconds, and is immediately ready to be worked with. We smoothed it with a sanding sponge.
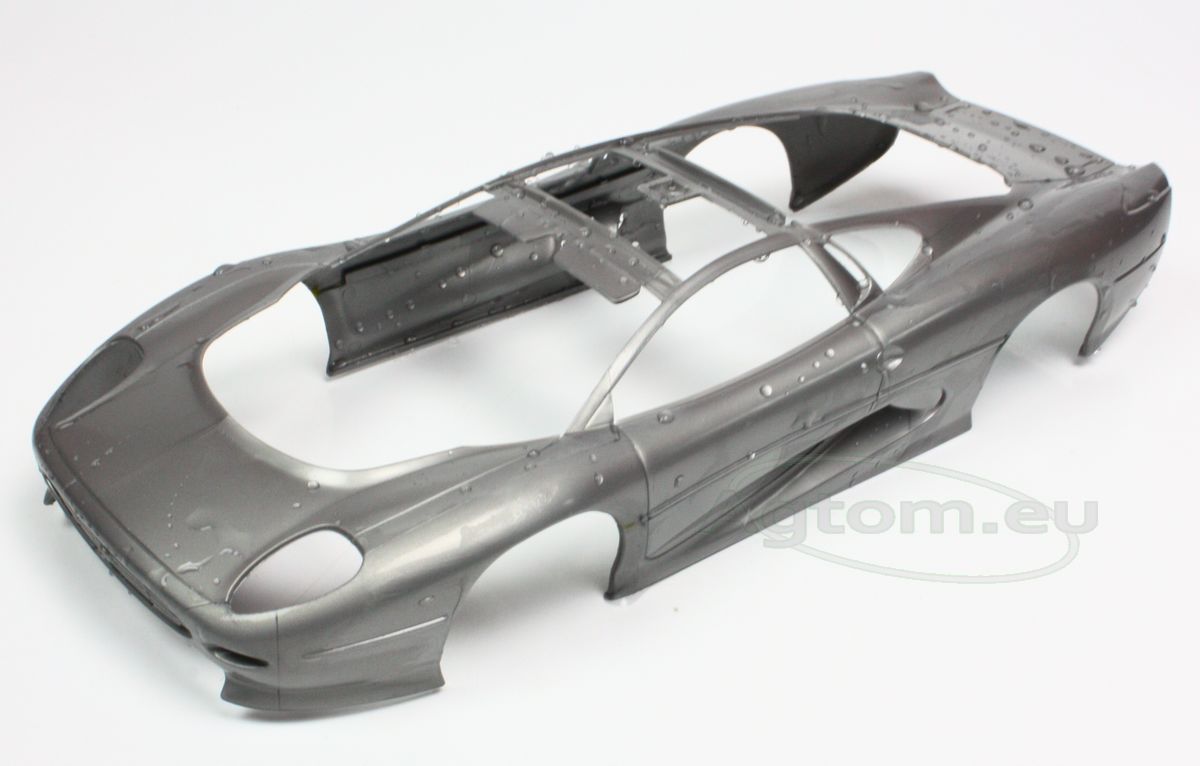
When the body seems to be ready, we carefully wash it in warm water with either soap or dish soap. We dry it with a clean cloth or paper towel and leave it to completely dry for a few hours.
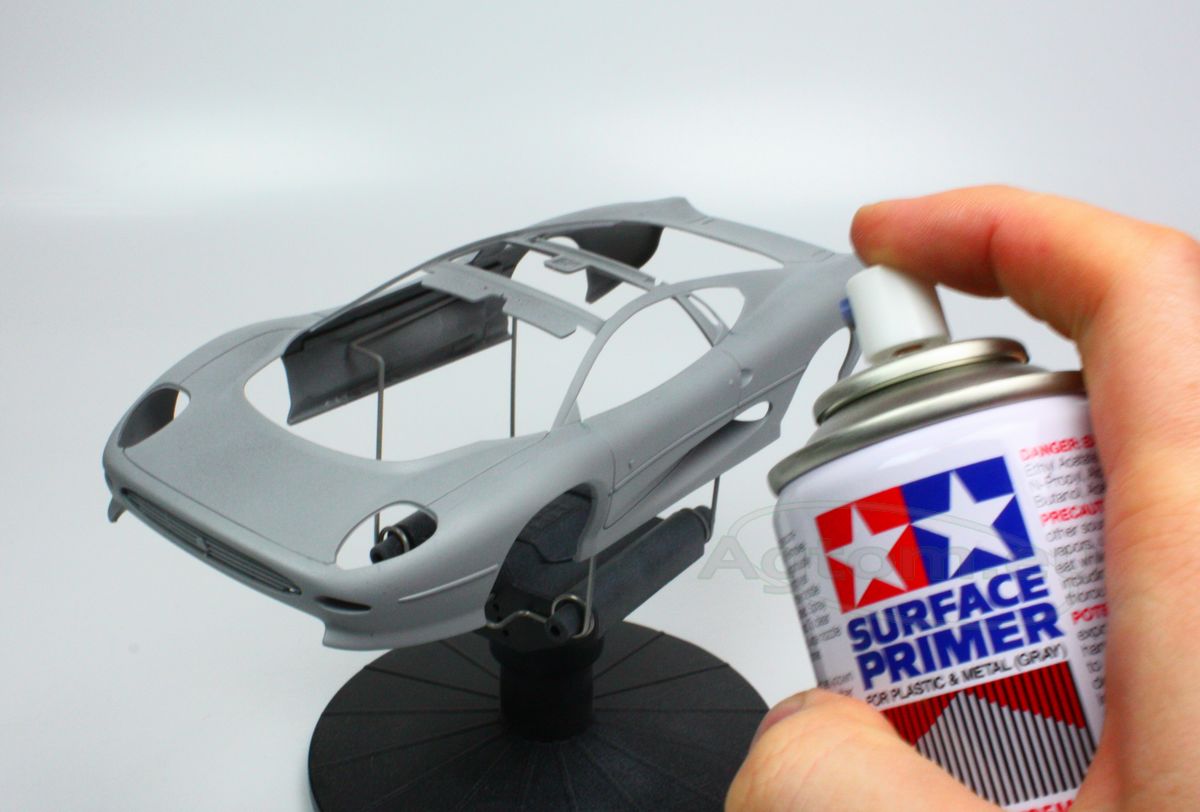
Priming your model is a crucial step during the model making. It is a must if you are using acrylics. It not only improves paint adhesion and prevents it from peeling, it also helps you in finding further imperfections on your model. If by any means you will find any moulds, chinks etc, now is the time to get rid of them for good. Use very precise sanding paper or sponge, and cautiously remove any flaws. If you need to apply putty, remember to grind gently to bare plastic, as putty won't hold on to paint.
Best primers and easiest to use are in a spray. You can use either Tamiya Surface Primer or Gunze Mr. Surfacer, as they both work very fine. You can also use primers with brush or airbrush, but those need some solid dilution with dedicated thinners (Mr. Color Thinner, Mr. Color leveling Thinner, Tamiya Lacquer Thinner).
The main clue when using primers is that you needn't cover whole model surface at once. It's better to paint with few very thin coats. That way, you will avoid any unnecessary problems, such as a too thick layer, stains or bruises.
Another important thing you ought to remember is the colour of your primer. Even after few layers of paint, the base tone will affect the final effect. Dark basecoat will make your paintwork darker, while with bright one will allow you to achieve much more vivid tones. For example, a black primer is great for dark blues or greens, while white is perfect for bright yellow or red. If you're not sure which one to choose, you can pick gray primer, as it is most versatile.
When painting with an airbrush it is necessary to basecoat your model, as thinned paint won't last long on bare plastic. If you are using spray paints, for example, Tamiya TS/AS or Humbrol, you don't need to use any primer, as the spray has got most of it's features. However, it's always safer to use a primer, as it gives much more flexibility and allows any corrections at this level.
And now to use primers. As we said earlier, use 2-3 thin coats of primer (either with spray or airbrush) in space of 10-15 minutes each. When the basecoat dries completely (which can take up to 24 hours), you can smooth it with sanding paper or sponge ( abrasion 1500-2000). Remember to clean the surface of the dust if you do so!
You can choose any color you'd like for your car. It's yours, isn't it? You can choose one of those described in manual from the box, you can search the web for pictures of that car, or you can customize it as you like. Anyway, it's up to you to paint brand new stock car, extensively used vehicle, or your own vision of that particular car. Unlike tanks or aircraft, you don't need to care about any standards or rules.
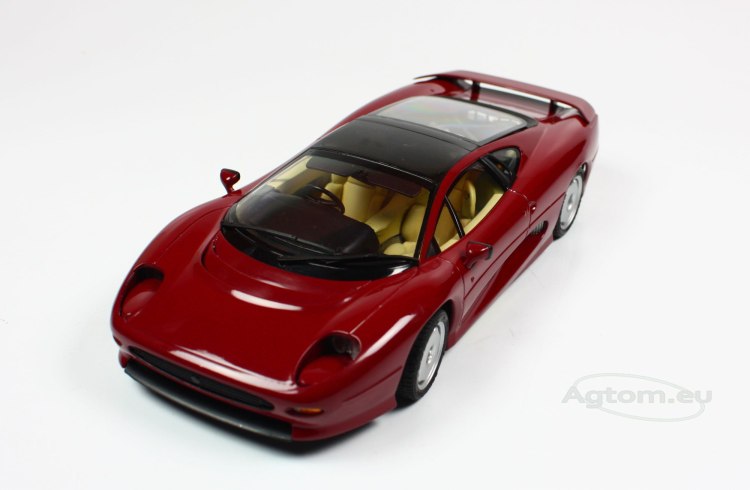
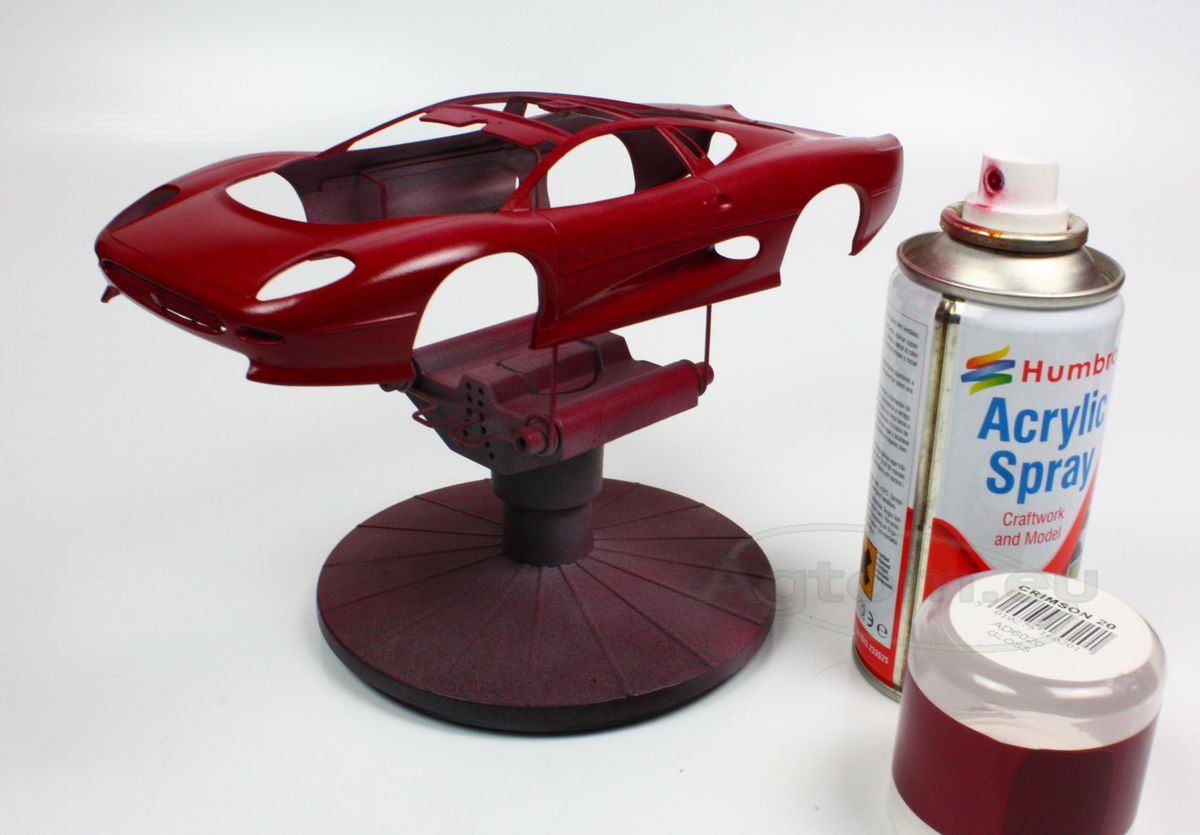
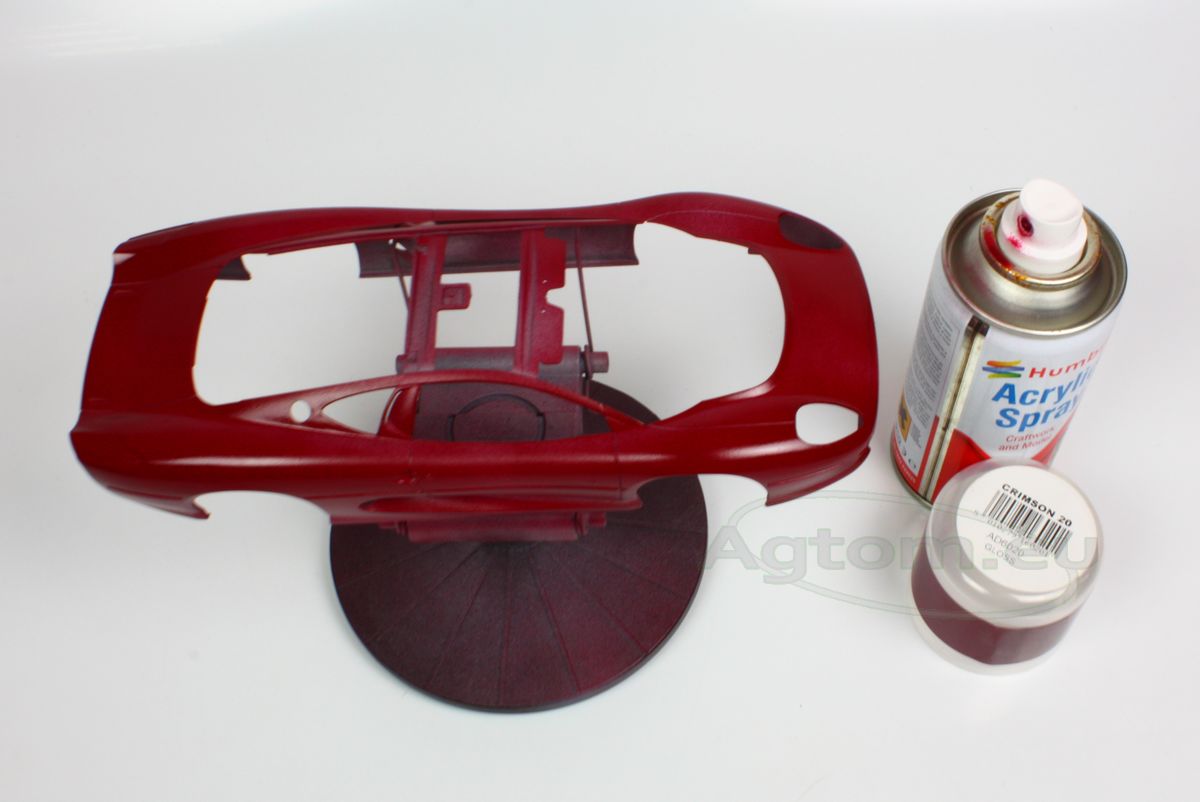
Our Jag was produced only in a limited number of 271 vehicles. The most common color among those was silver metallic, which is proposed by Tamiya in the manual. We have chosen a slightly different scheme and decided to paint it with Humbrol Crimson Red (20), as some of the stock cars were made like that too.
Now, there are some rules when painting with acrylic spray paints. First of all, you need to remember about adequate temperature. Minimum at 17-18 Celsius. It is important, as cold may affect your paint when drying, and create a white coating, which can ruin your work almost at the start. You should also remember about good ventilation of your workspace. You should also consider putting on a mask, to avoid any chemicals. Also remember that spray paints aren't as accurate as airbrush, and they have higher pressure and bigger dispersion. Remember to secure your area of work, if you don't want to clean it of dust in color of your spray.
Off to painting now. Paint your basecoat model in few thin layers, just like with primer. Each coat should be painted in interspace of 10 to 15 minutes. It's important not to apply too much paint, as you can have problems with stains and bruises, and then, you must go back to sanding an priming your vehicle again. It is possible to apply 2 coats only, just check if the whole body is painted neat and clean, and primer doesn't shine through anywhere. After you paint the whole body, you need the paint to dry solid. Leave it in tha safe place for approximately 12 hours.
If your model has any decals to set, now it's time to apply them. Spread a thin layer of any decal fix (Micro Set, Humbrol Decalfix, Tamiya Mark Fit, Vallejo Decal Fix), next put your decal into the water to activate it, finally, apply it gently with a clean brush. If decals are complex (which happens often with WRC and race cars), use Micro Sol or Vallejo Decal medium for extra softening and ultimate fit.
More about setting decals in our series “painting German vehicles”.
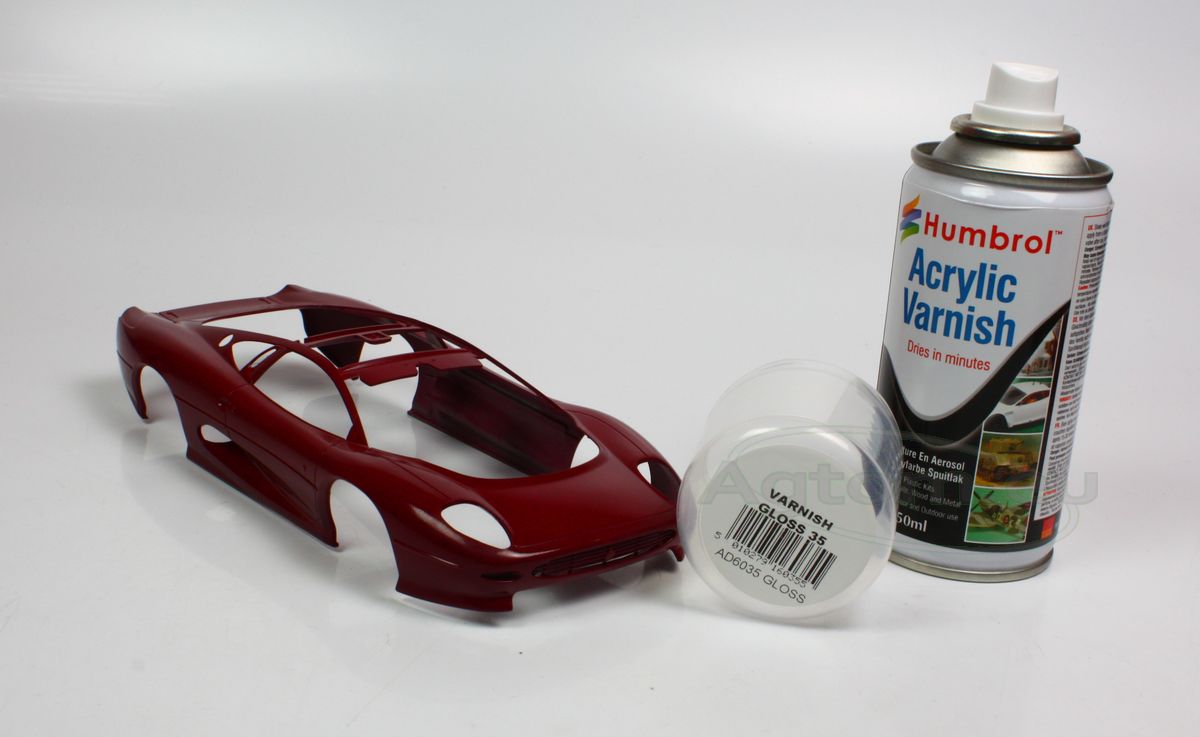
When we paint with spray (or airbrush), the effect of car paint is way better than when painting with a standard brush. To achieve more realistic and depth of color, we will use clear varnish, in this case, Humbrol No. 35.
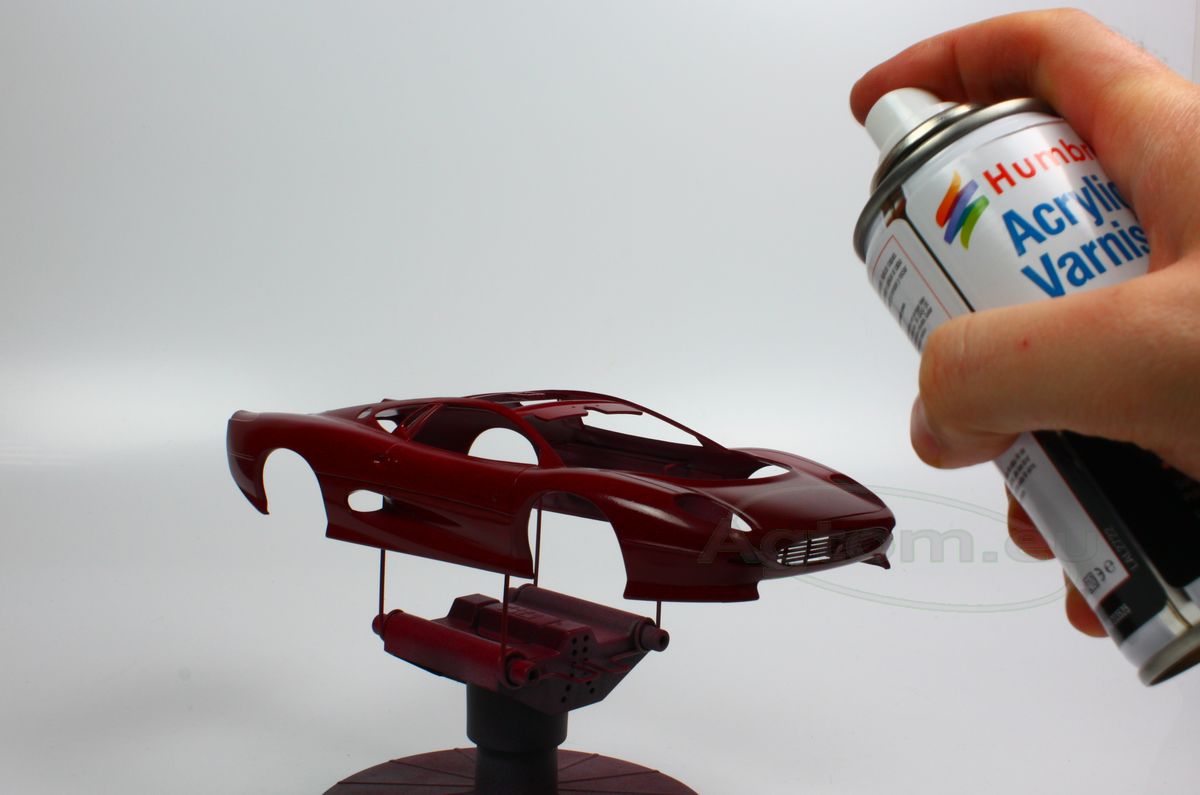
Again, using varnish in the spray is very similar to proceeding steps. Three layers in same spaces of time. The first and second layer should be rather thin, the third one, however, may be thicker. That's because it will be sanded and polished later. Remember to paint carefully not to create any bruises.
Now, leave your car's body to dry for another 24 hours.
When varnish dries, it won't be flat but will create an “orange skin” effect. Don't worry, that's why we have applied three layers of varnish. Now we will polish the whole body to make it super smooth and shiny.
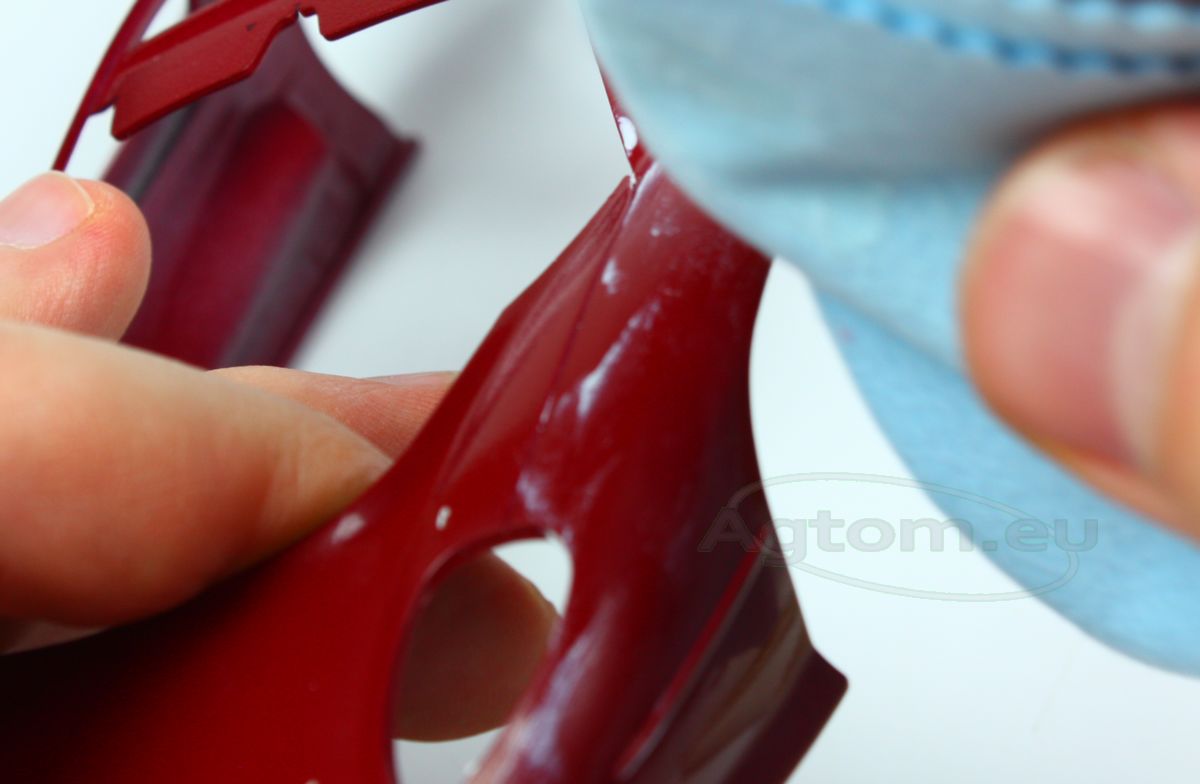
At first, we shall use sanding sponges from Tamiya. For this kind of work, it's better to use high abrasion sponges, like 2000-3000. Bigger and wider surfaces should be gently grinded with both instruments following. Remember to ab\void sanding edges, as you may easily peel off all varnish and damage paint underneath. Remember to be very cautious and observe dust on the sponge. It should be either white or transparent. That means, you only tear off the varnish. If the dust becomes the color of your paint, don't worry, using polishing compound will solve this problem.
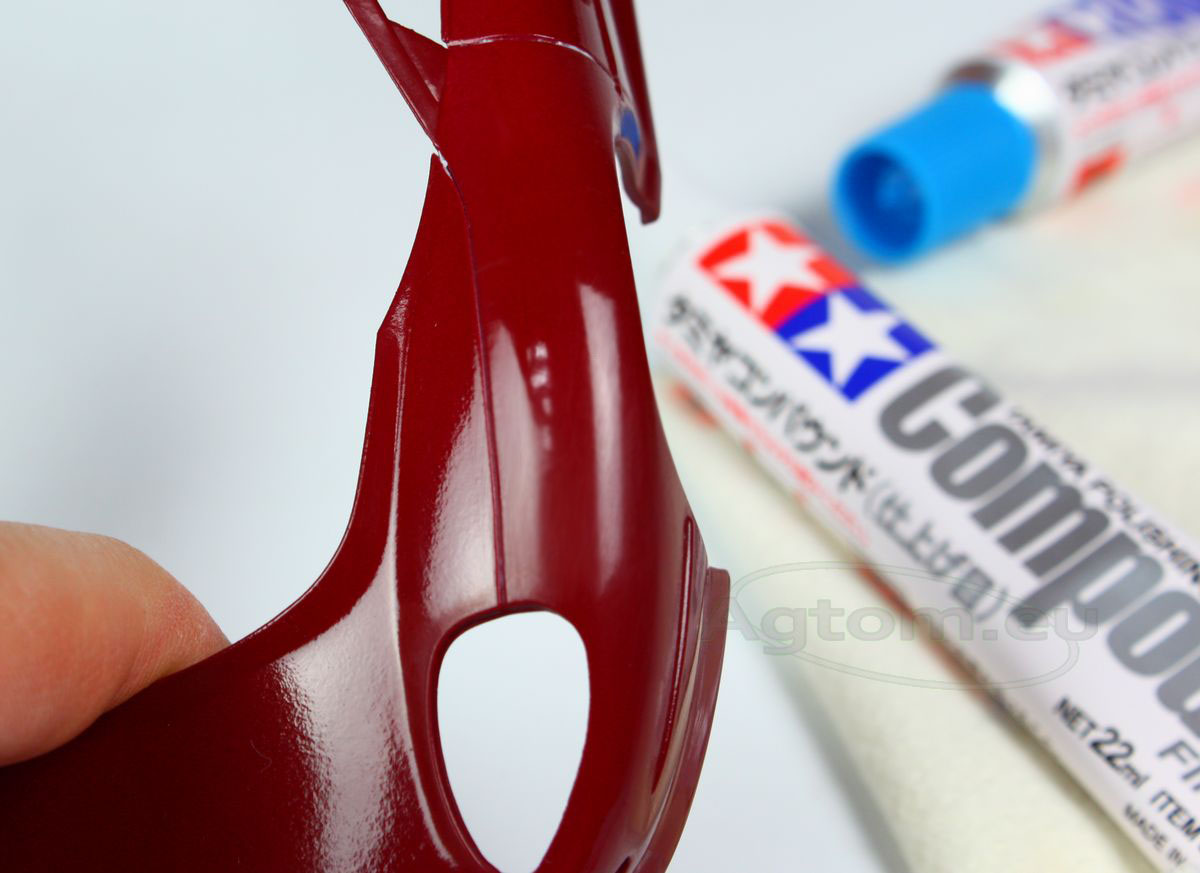
Now we will use all three polishing compounds from Tamiya. Subsequently, we apply Coarsen Fine and Finnish paste using the polishing cloth. Polish gently and patiently, until all body is smooth, clean and shiny. All three steps may take some time, but you will see that it will pay off with great effect.
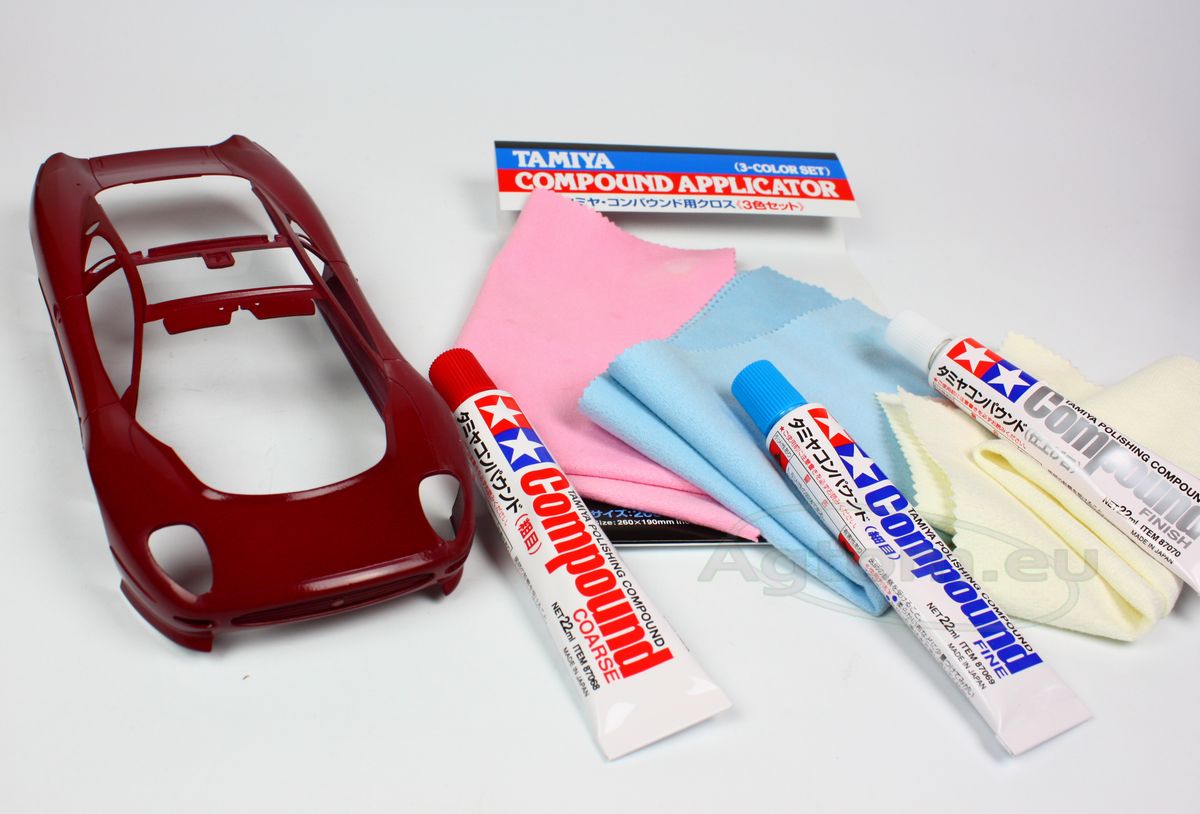
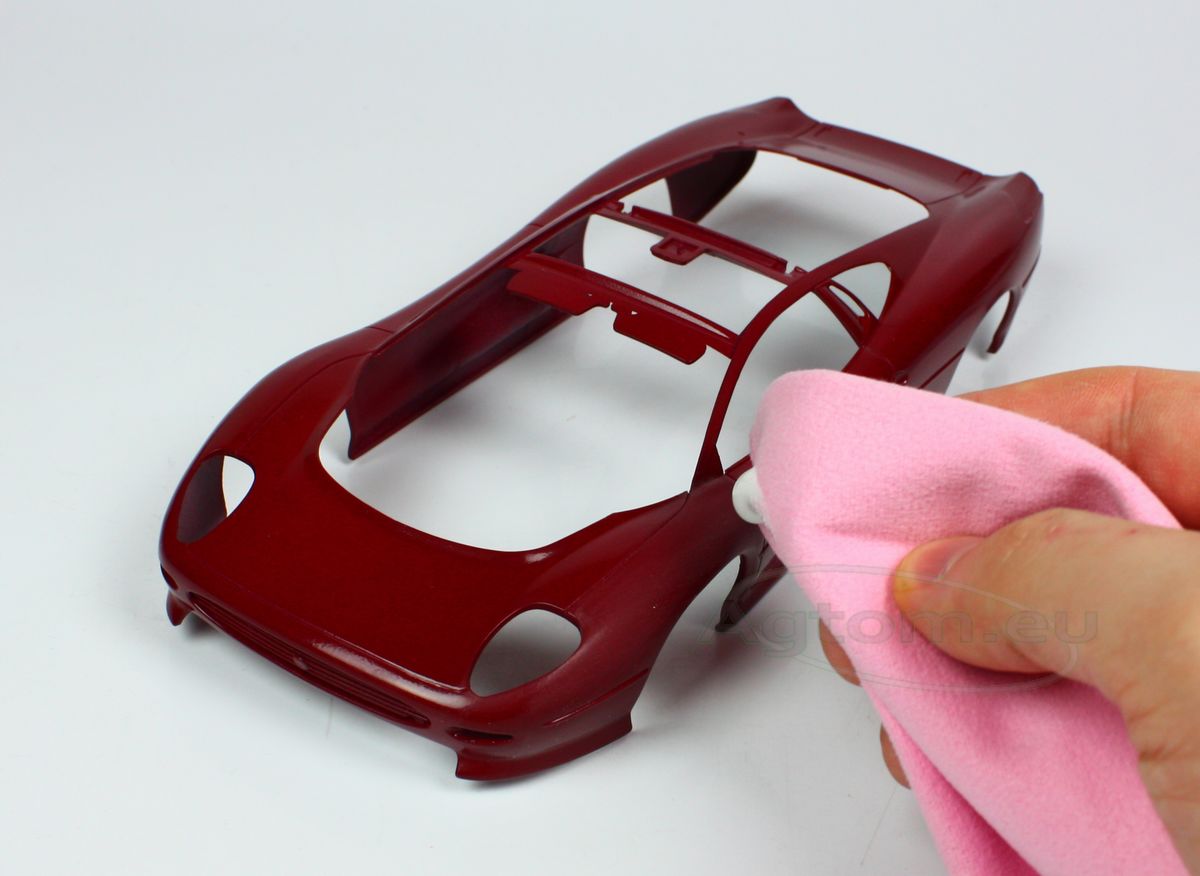
Each polishing step should be made on any body part of the car, to create the same effect on all parts of your car.
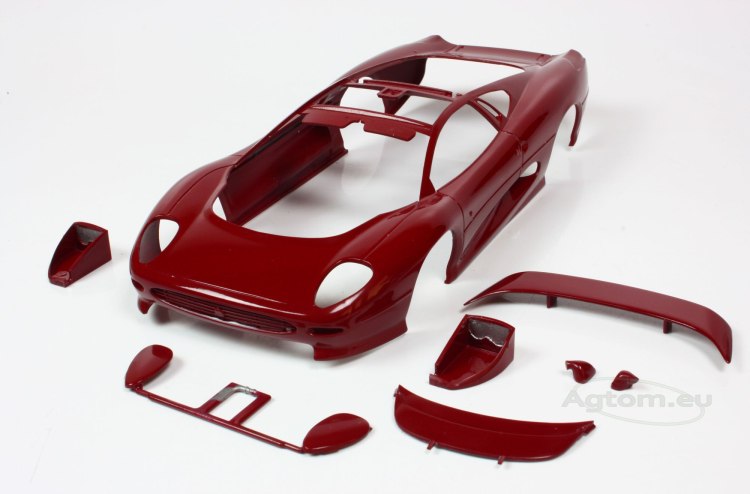
When the body is finished, we only have to paint door bars and grill with semi gloss black paint. We have used an airbrush and Tamiya X-18 semi Gloss Black. If you are using airbrush too, remember to precisely mask body, not to paint it by mistake. Don't cover the whole body either, because masking tape may cause damage to the paint job.

Klej Tamiya Extra Thin 40 ml szybkoschnący
HUMBROL Farby Akrylowe w sprayu 150ml
Farby w sprayu Tamiya TS 100ml
Farby Akrylowe TAMIYA mini 10ml