No products
To be determined Shipping
0,00 zł Total
 EN
EN
Before you start with the interior, find a proper photograph of your car. You will have an example of how your cockpit should look like. Very ofter car interiors are designed for one exact body color, so it's quite important to check which pattern looks best with body color you have chosen. Moreover, you can plan and design your own improvements for your car, such as seatbelts or car rugs. In this short tutorial, we will show you how to make rugs, how to paint upholstery and how to paint leather elements.
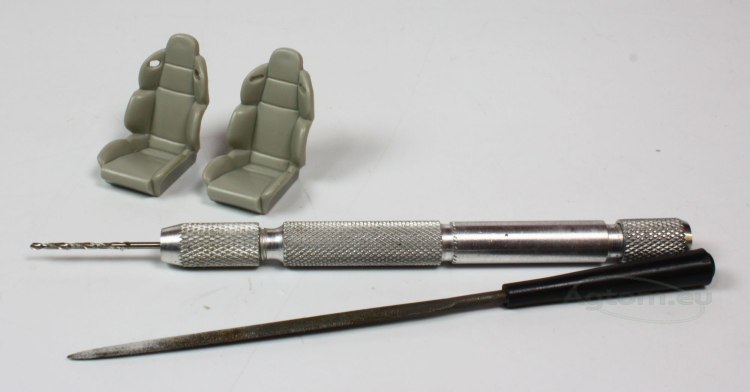
We begin our work with drilling holes for seatbelts in our seats. We use a hand drill and fine file. Rember, you will need very thin and delicate file, as the holes are rather small and easy to damage when inattentive. If you don't have such small file, you can roll sanding paper and use it as well.

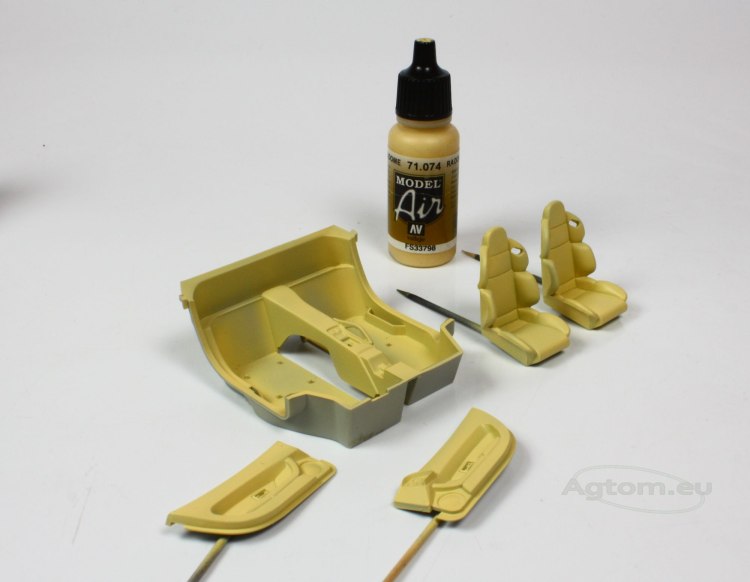
With our chassis and body, we've been using spray paints which didn't need a primer. For interiors, we used acrylics, so we needed to prime each element. We've chosen Tamiya Surface Primer, which we diluted with Mr. Color Levelling Thinner and sprayed with an airbrush. You can also use any primer in the spray if you want.

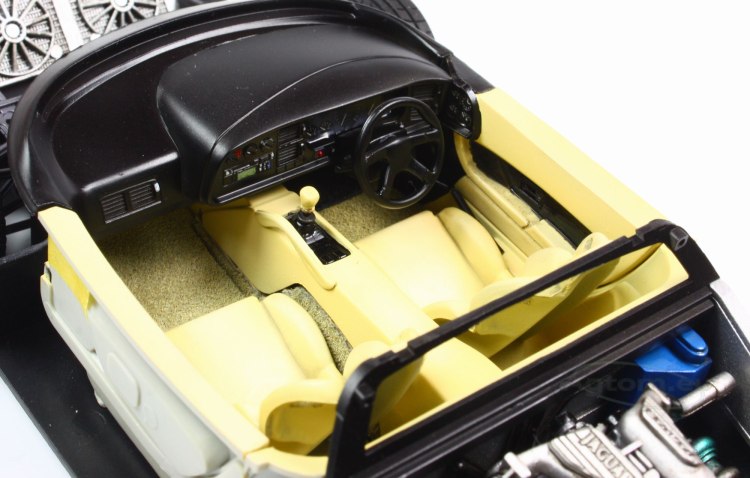
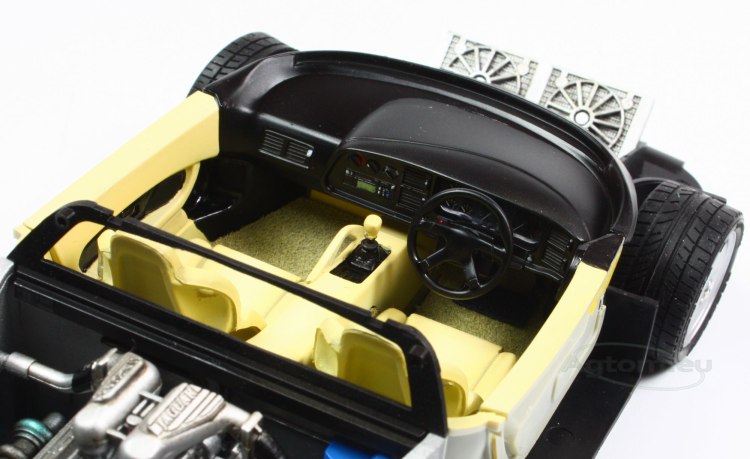
Next, we have painted floor, doors and seats with Vallejo Model Air No. 74 Radome Tan. Its beige tone is perfect for leather.
In the next step, we used a technique called color modulation (more about in our Painting German Tanks Tutorial). We have mixed VMA No. 74 with White No. 1 to highlight elements most exposed to the light.

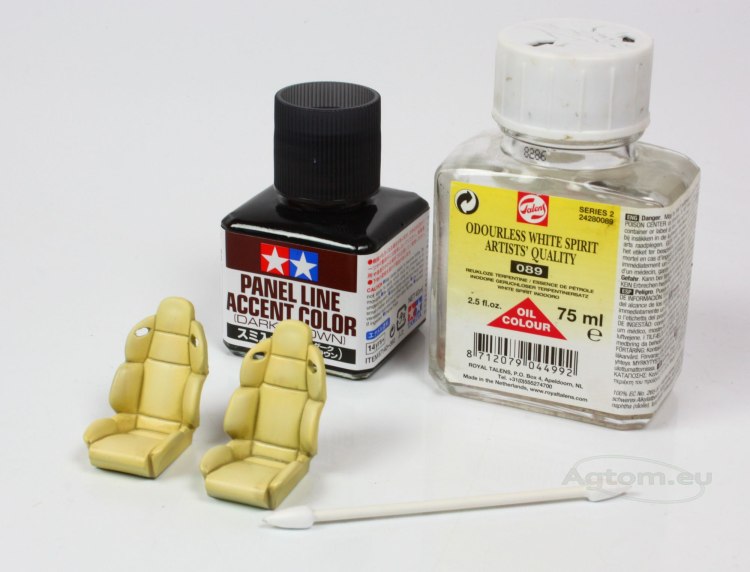
To give our leather more contrast, we decided to use enamel Panel Line Accent Color from Tamiya again (see Part III – engine). Before you use enamel wash of any kind, it is good to coat each element with Satin Varnish. It seals acrylic paint and prevents it from any damage from enamels or White Spirit. After you apply your wash, you can clean it with a cotton bud and White Spirit from any element if necessary. You can use Turpentine or any enamel dilutant (i.e. Tamiya X-20), but White Spirit is the best for this task.
Our interior is nicely painted and modulated in beige leather color. However, our interior is built from other materials too. Any composite elements, panels or components were painted in satin Tamiya X-18 Semi Gloss Black.
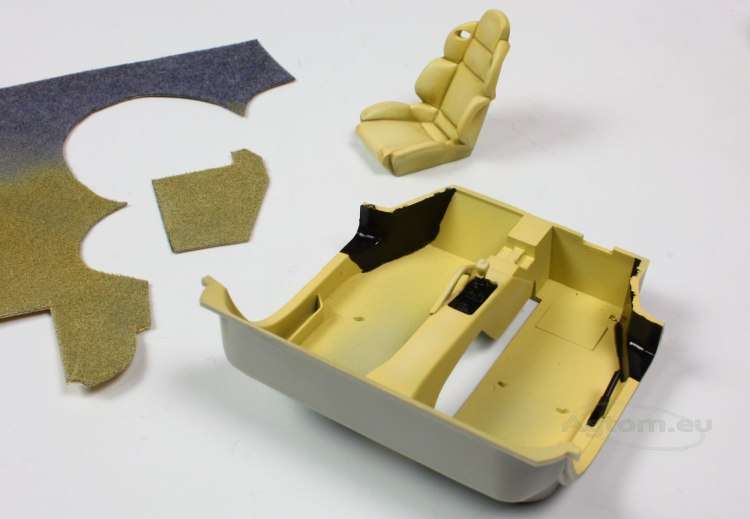
Now we need to make car rugs. There is an easy way to do so, using velours sheet which you can find in haberdashery or most DIY or design stores. Cut a proper shape you need out of it, and voila! – your rug is ready. If you can't find proper color – don't worry, as velour may be painted over with acrylics.


In this step, you will find photograph samples most useful. Paint all details as in the original car, all the buttons, radio and other elements in proper colors. Remember to use sharp, pointed brush as it is far easier to paint such small details with it. Another tip – for white elements use bright gray color, as it looks more natural and gives less contrast to the pale black desktop.

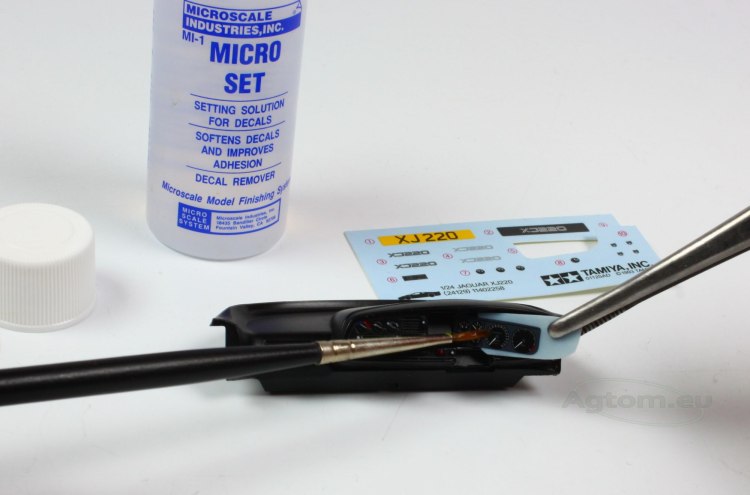
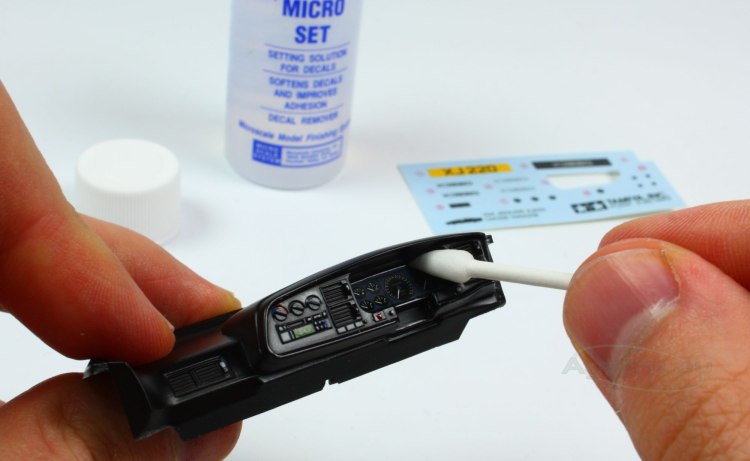
Now, we gently apply decals using a soft brush, pincers, Tamiya cotton bud and Micro Set.
Each interior component is now ready, the only thing left is putting our kit together.
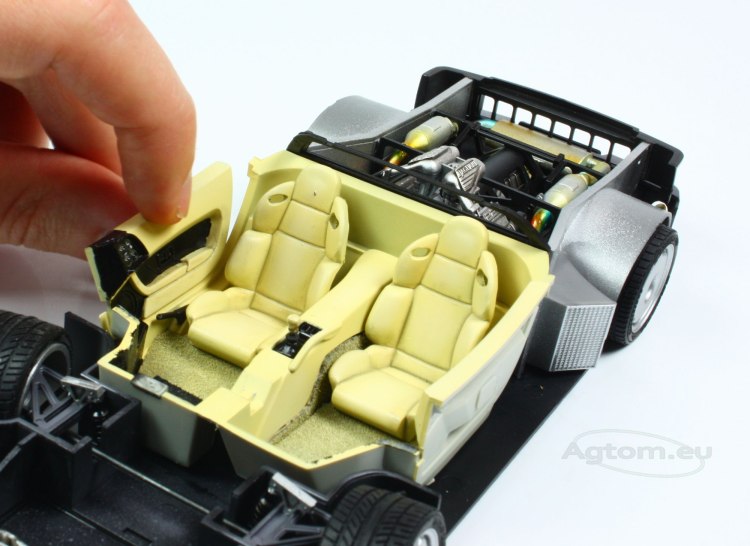
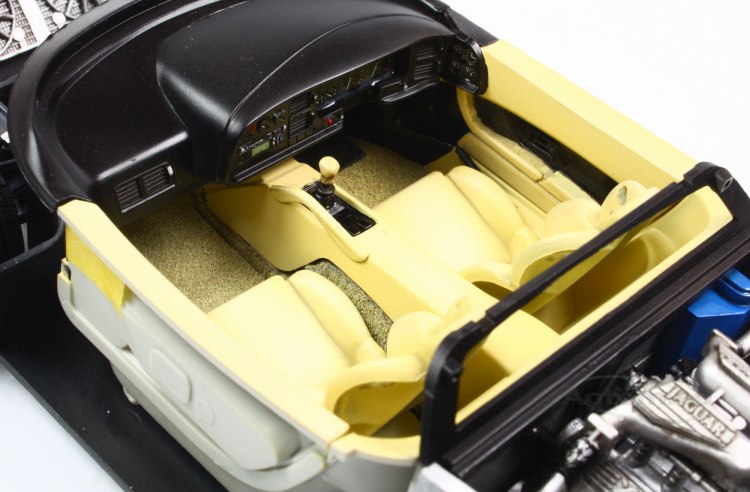
We glued steering wheel, pedals, gear knob and handbrake.
Farby Akrylowe VALLEJO Model AIR do aerografów
Farby Akrylowe TAMIYA mini 10ml
Rozcieńczalnik do farb akrylowych Tamiya X-20A
Tamiya Panel Line Accent Color
Klej Tamiya Extra Thin 40 ml szybkoschnący
Aerograf HARDER & STEENBECK ULTRA
