No products
To be determined Shipping
0,00 zł Total
 EN
EN
Decals are little markings or transfer sheets added to most plastic model kits. Their glue is activated by water and can be easily used to mark your model. Most of the decals are historically accurate, and help in the reconstruction of most famous tanks or vehicles, for most exact and realistic look.
Before you start applying markings on your vehicle, you will need to prepare its surface. You should note, that decals adhere best to flat surfaces. Most of the paints have slightly rough micro structure and can disturb proper decal imposition. Furthermore, some of the decals adhesives may react with paints, especially acrylic, and damage your paint job. To prevent any of those situations you have to smooth your models surface, and the easiest way to do so is to cover it with gloss varnish.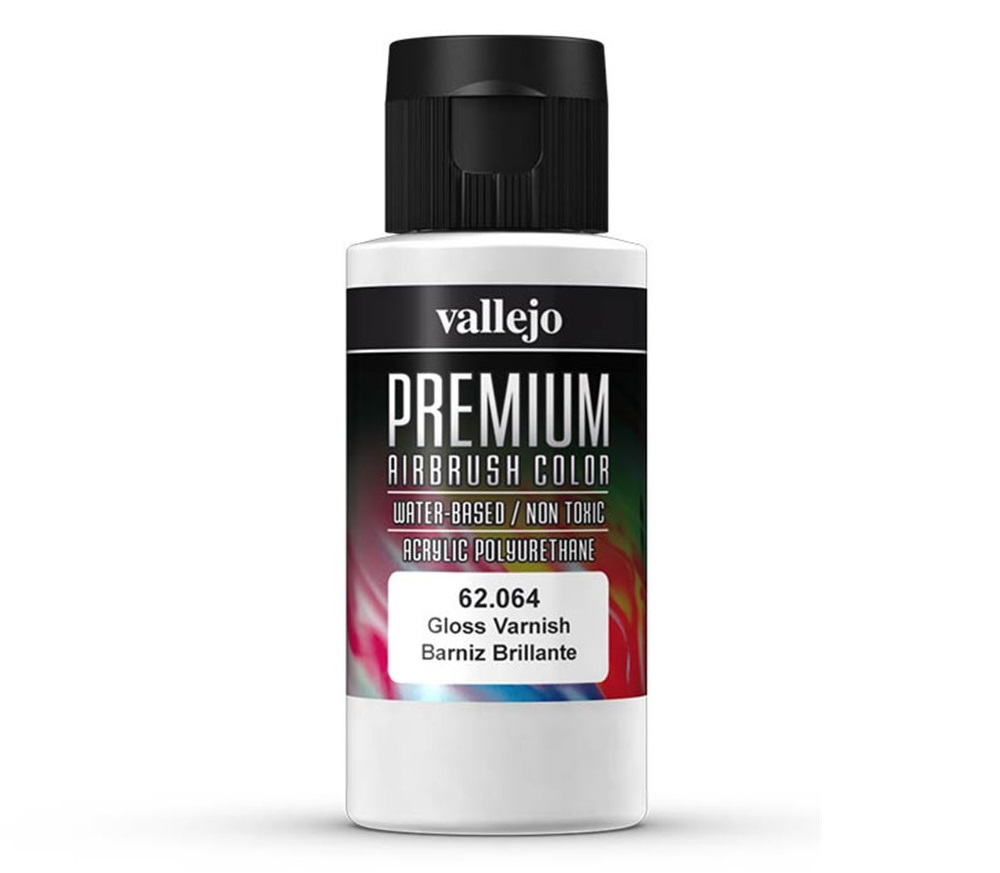
You will find that there are many types of varnishes on the market, and we can distinguish 3 different types of them. First of all, varnishes dedicated for a brush. They can be easily applied on the model, but it takes some time and needs some extra patience and attention to cover the whole model with the coat of the same thickness. Secondly, varnishes applied by spray. They are easy to handle and allows quick work, but aren't as precise as the third type – varnishes dedicated for airbrush. With airbrush flow, you can easily manipulate the thickness of the coat and apply your varnish super fast. It is super fast and super accurate method, that is why we have chosen it.
Among those varnishes dedicated for airbrush, we find Vallejo Premium Airbrush Color series. They don't require any dilution and are ready for work just after shaking. They don't leave any marks or spots and dries very fast. We have airbrushed whole model surface with one layer of the varnish after it dries we can start working with our decals.
Decals may differ in many characteristics, depending on their age or how they are stored. They may be thicker, thinner, rigid or flexible. As we said earlier, glue on the decals is activated by water, and sometimes water is all we need to apply them. But for the best effect, we recommend special preparation for proper marking adhesion and softening.
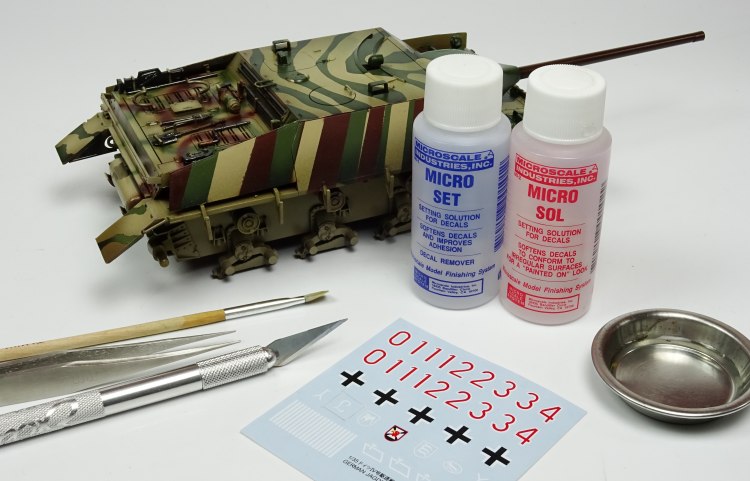
Most of the modelling accessories producers have decal fluids in their offer, Humbrol has Decal Fix, Tamiya – Mark Fit, Vallejo has two fluids – Fix and Medium. However, we have chosen Microscale products, as they are considered as the best on the market by many modelers. Microscale has two fluids, Micro Set, for proper application and light softening and Micro Sol for heavy softening on rough or complex surfaces (handles, screws etc.) and edge alignment.
Apart of our fluids, we will need some standard tools, a hobby knife, tweezers, brush (we recommend the brush with flat hair). Handkerchiefs and cotton buds may be of use too.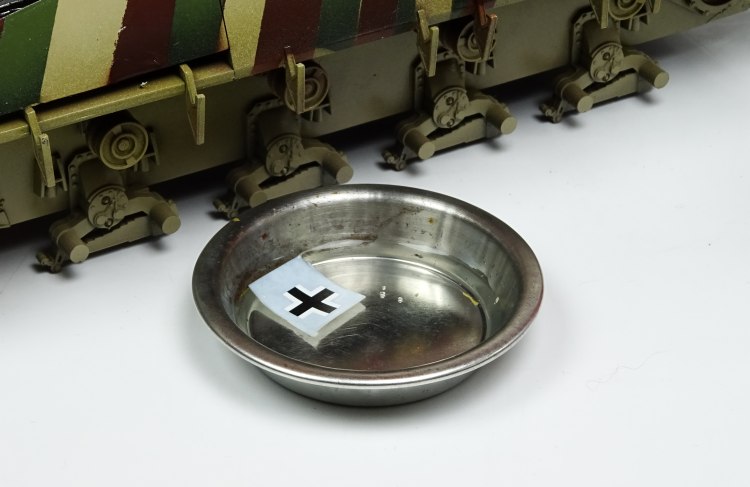
First of all, we need to cut our decal from the transfer sheet with our hobby knife. Then, we need to put our mark to the pot with clean water for no more than 1-2 minutes or until we see that glue is already activated (the marking may be moved on the transfer sheet).
In the meantime, you need to apply first liquid (Micro Set) on the spot where your marking will be. It will help adhesion and enable setting your decal in the right place and at the right angle.
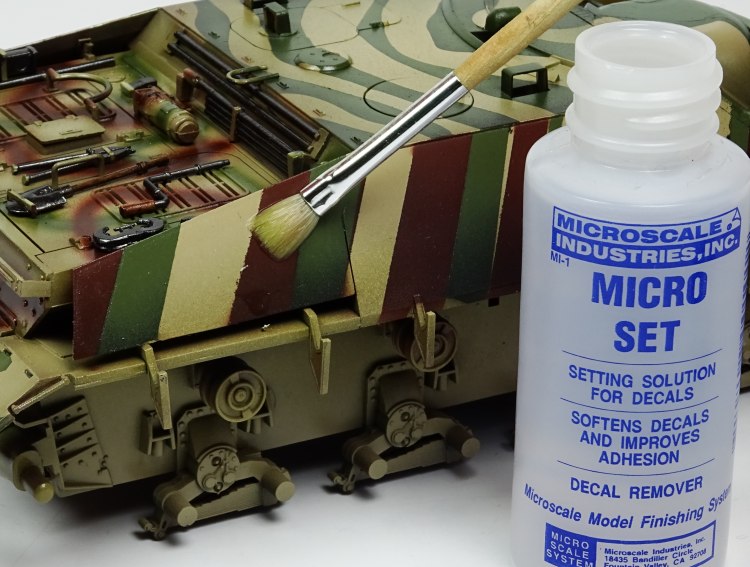
Secondly, get transfer sheet with your decal out of the water using tweezers and gently apply your decal with flat brush. You mustn’t hurry, as Micro Set will allow you to make any corrections you need. After it dries a bit and your decal is in the right place, gently smooth it with your brush to prevent any air bubbles under it. You may use cotton bud or handkerchief to remove any excessive fluids from the model. Now leave your marking to fully dry.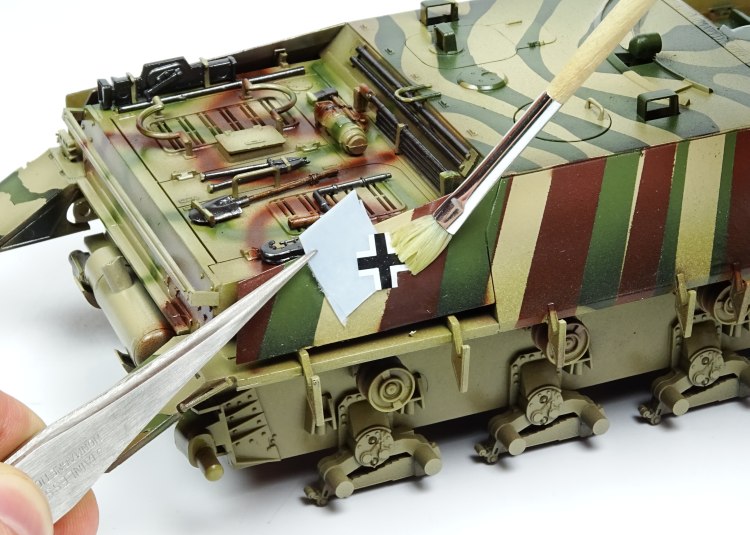
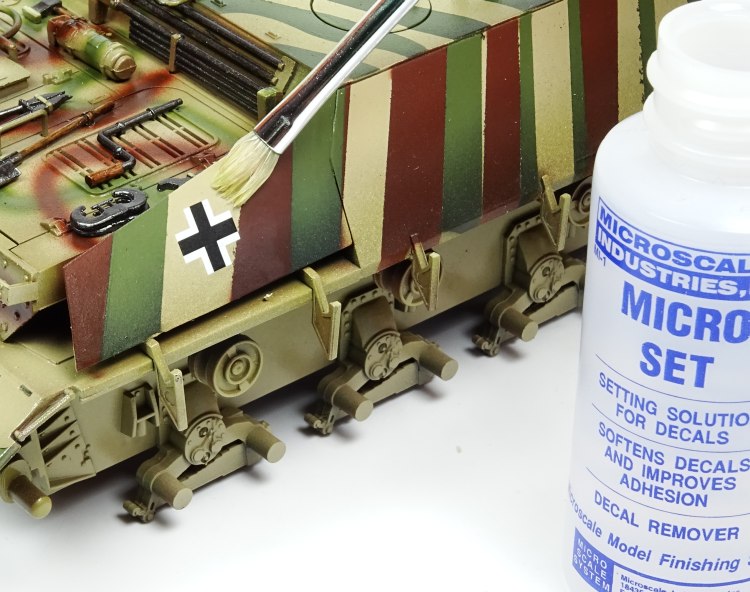
After your decal is set and dried to the surface, you may impose a layer of Micro Sol on your marking. It will further soften it and help the decal blending into the model and cover its edges.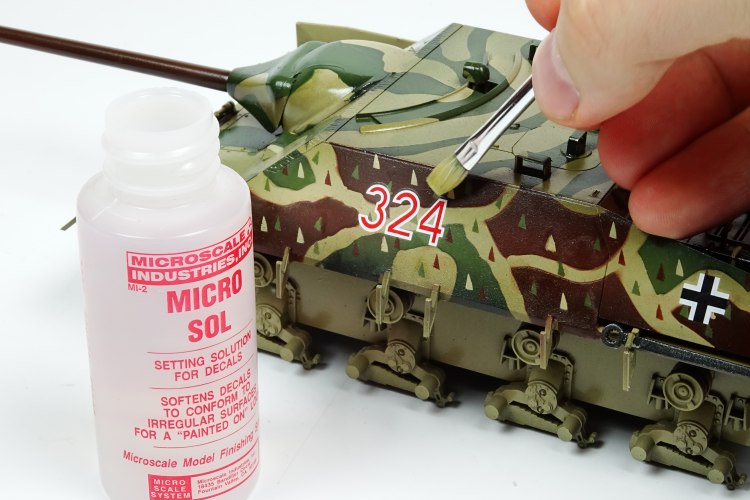
Now your work is done, wait for about 24 hours before any further work on your model. Let the decals soften and dry well. After this, you can protect your model with another coat of varnish – matt for finish or satin for filters and washes.
Thanks for reading, we hope you find this short tutorial about decals helpful. Happy painting, and stay tuned for next article about washes, weathering and effects.
| |  |  |  |
