No products
To be determined Shipping
0,00 zł Total
 EN
EN
Effects are specimens created especially for recreating realistic weather, time and exploitation influence on your models. With their help, we can create almost any damage caused by various factors. We have huge amount of products of this type on the market with enamel based Ammo of Mig Jimenez and AK Interactive or brand new acrylic Vallejo Weathering Effects line. Out of pure curiosity, we wanted to check out that new Vallejo line, so we have chosen them for our Jagdpanzer.
The first effect we tried out was dense mud with vegetation – Vallejo Environment Mud and Grass (73.826). It has a form of paste, it dries much faster than classical enamel effects, but it is enough for making any corrections and removing excess product. You can put in on your model with either brush or spatula. This particular effect is perfect for tracks, wheels and chassis. On this stage of work, we have applied only a little of this effect for making a texture for further weathering in those areas.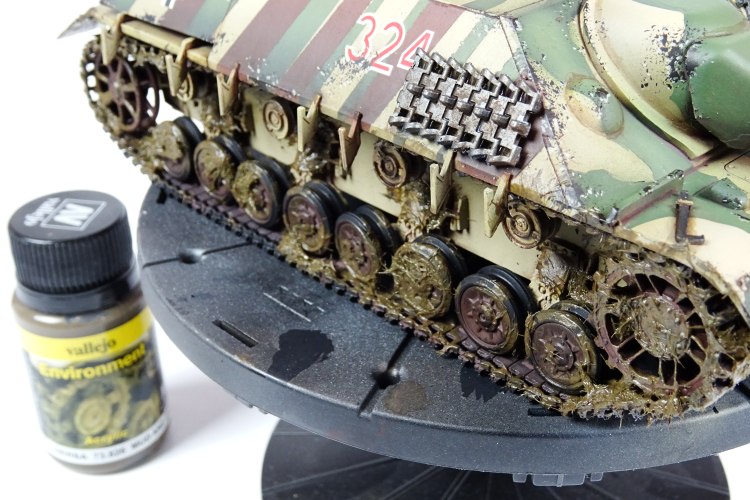
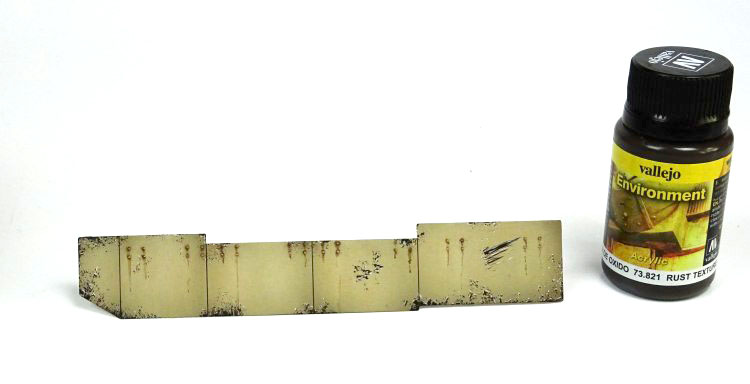
Another Vallejo Environment effect we used was Rust Texture (73.821). It can be used for creation of rusty streaks on your models. We used it mainly on pins, screws and other nooks where rust often occurs. This effect dries very quickly, so you need to be very accurate during application, because you will have little time correcting any mistakes. However, final effect is very impressive and looks really natural.
The last effect we decided to use was Vallejo European Splash Mud (73.801). It is probably most perfect wet and splashed mud effect we have ever used. It is glossy, looks fresh and applies super easy. We applied it using a brush and air flow from the airbrush, to create most realistic and dynamic effect of splashed mud on the model surface.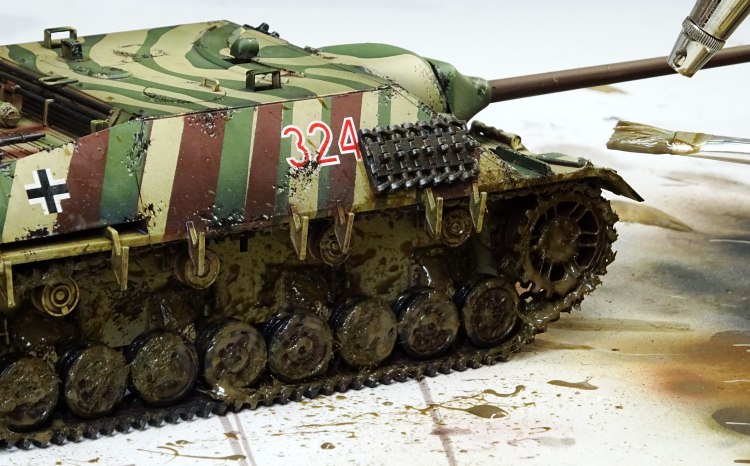
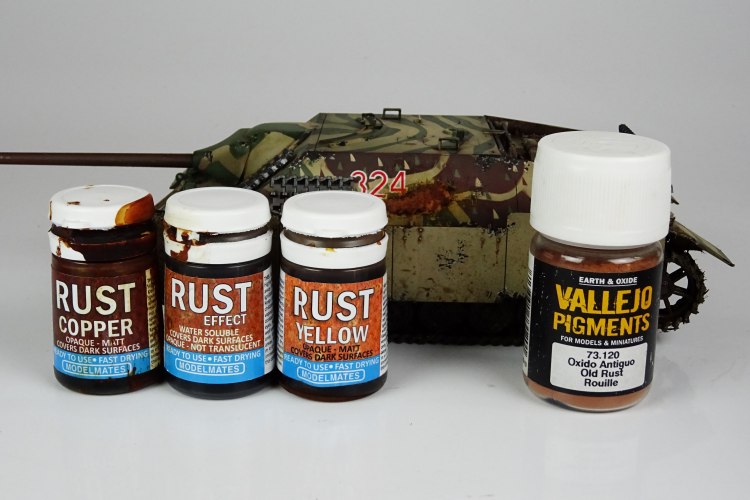
During our paint job, we decided to add one more effect to our model – rust. In this part of article, we will show you how to create simple rust effects in no time. We will show you two methods, one using paints and second using pigments. During painting process we found two spots which didn't satisfy us, so we decided to redo them with rust.
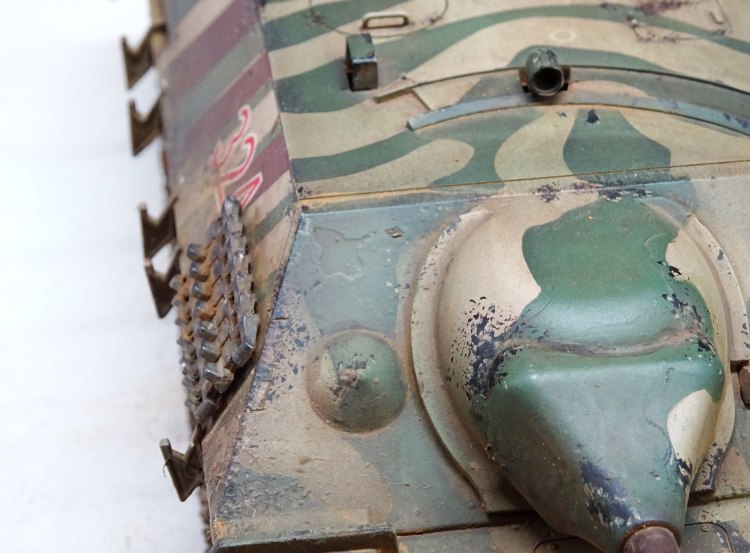
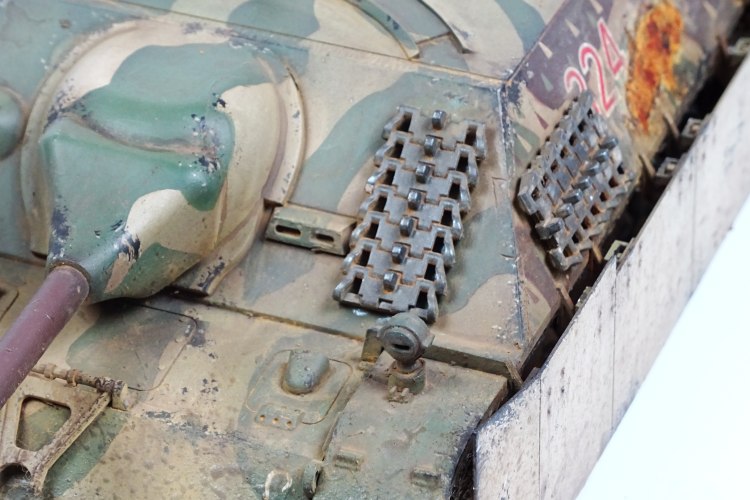
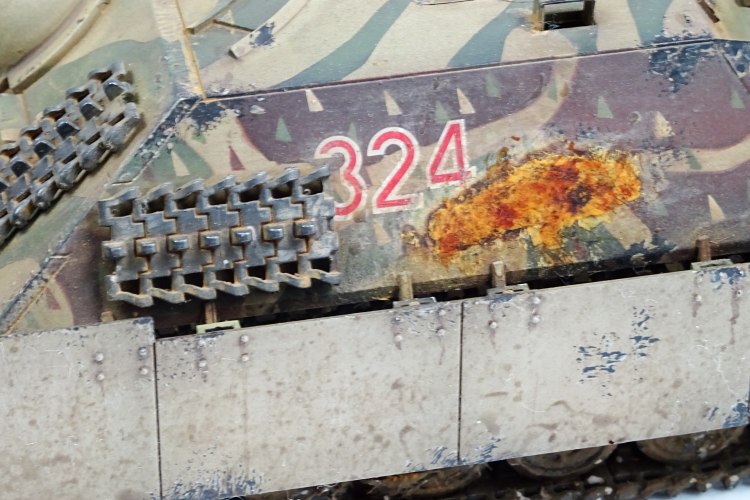
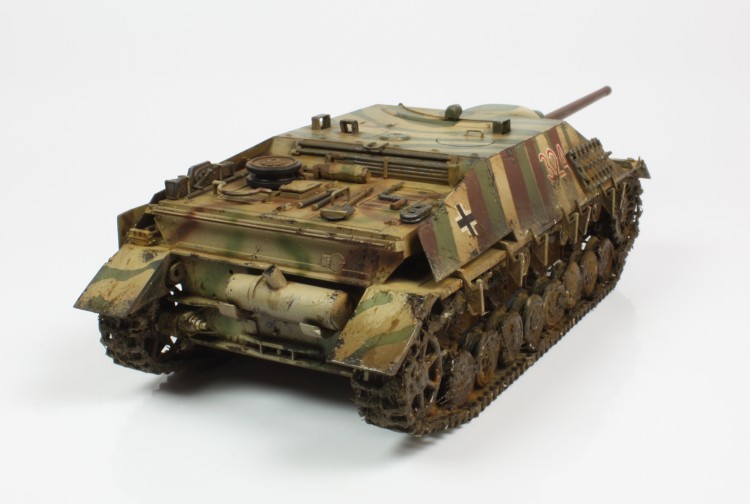
On the left side of the vehicle, our sponged scratches were too focused on the armor area. We decided to use brilliant Model Mates paints – Cooper Rust, Rust Effect and Yellow Rust, to fix the problem. We applied each of those paints with old brush with split tip and painted spots of rust all over the area. We started with a darker color as the base and then highlighted it with two lighter shades. The effect was absolutely great. Model Mates paints not only create rust in very realistic color but with rugged structure too. They are perfect for rust creation of every type you can imagine. Depending on thickness of each layer, those paints may be transparent or not, so you can experiment with them for the best result. At the end, we added a little of Vallejo Old Rust pigment for contrast, as it filled micro structure of the paints perfectly.
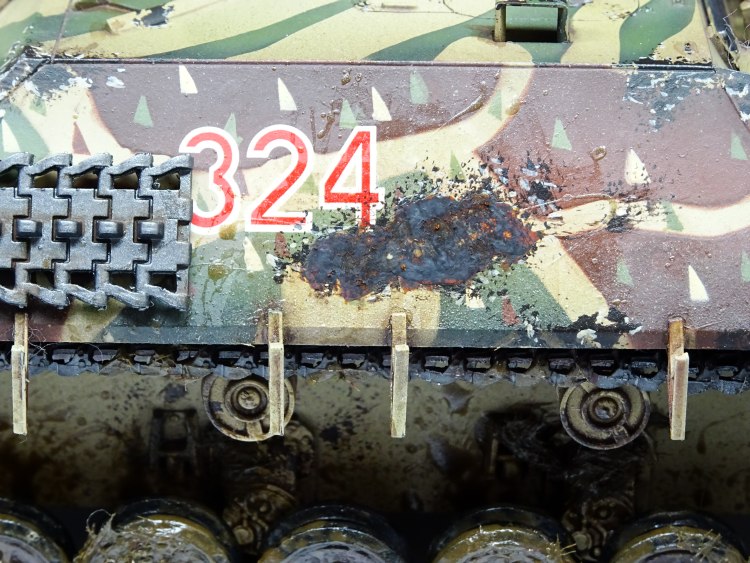
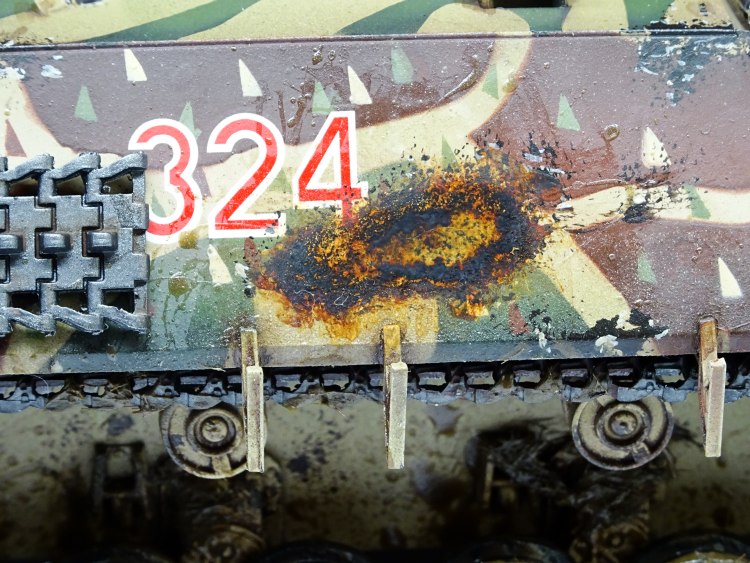
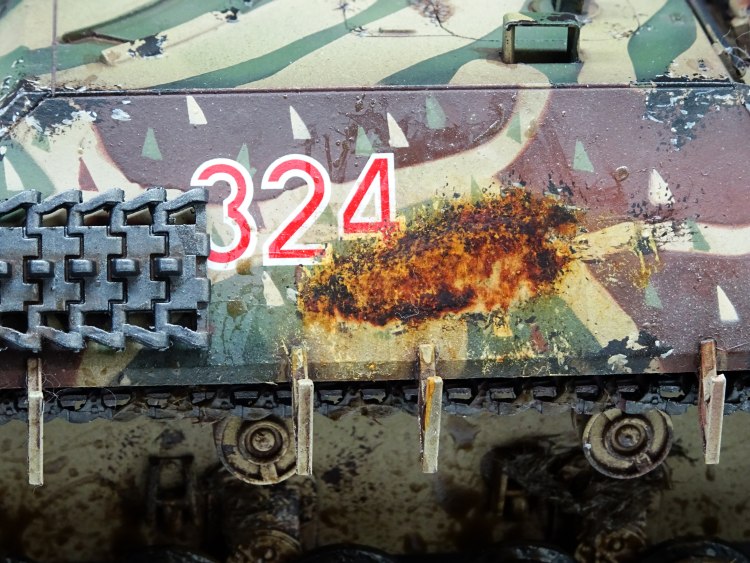
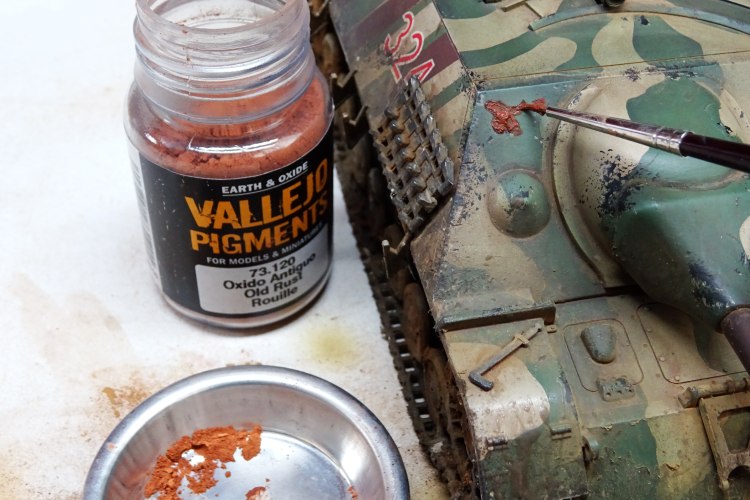
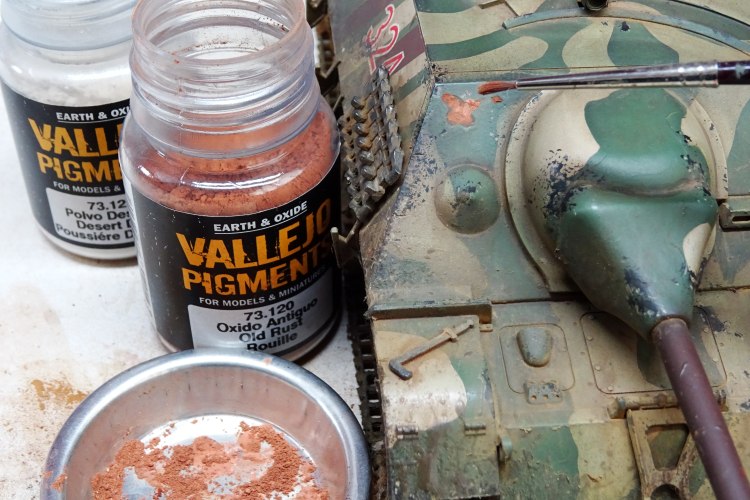
On front armor plate of our Jagdpanzer, we had a little problem with Mr. Masking Sole, which took some of the paint while it was removed. We decided to take the best out of it and create a chip in that place. To make it we decided to use Vallejo Pigments. As a base color, we chose Burn Umber color. We added a little water and applied it to the model with a brush, making little spots to create rust structure. When it dried, we use less watered down mix of Vallejo Old Rust and repeated the process to highlight our rust for fresh rust effect. Remember to make the spots irregular, for most realistic effect. In the end, we added some dry pigment mix of Old Rust and Desert Dust for final highlights. Any excessive pigment was removed with airbrush air on very low PSI.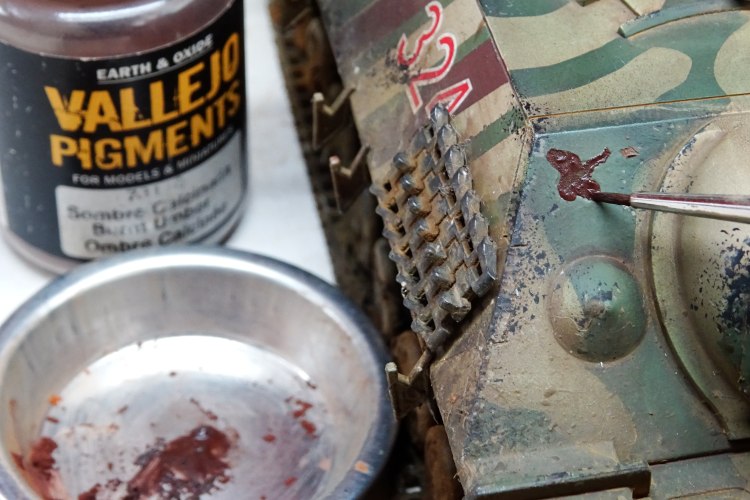
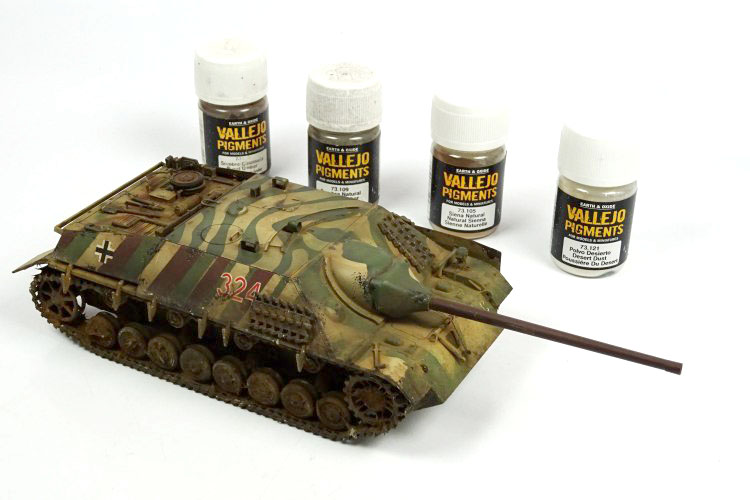
Pigments are special preparations for making dust, dirt, mud, soil and almost any other effect on your models. In this part of our article, we will show you how to use them in different ways and purposes. You have already seen using pigments on micro scale for smaller elements, now it's time for more.
Pigments are light powders, so while working with them use a protecting mask and do it only in well-ventilated rooms. Pigments may be prepared on palette, in spare pots or may be applied directly from container.
Pigments may be mixed with special Fixer, White Spirit, turpentine or water. First three allows longer drying time, so you will have more time to apply, fix or remove your pigment. If you want to have extra time for your work, we recommend using them. They are easy to apply with brush.
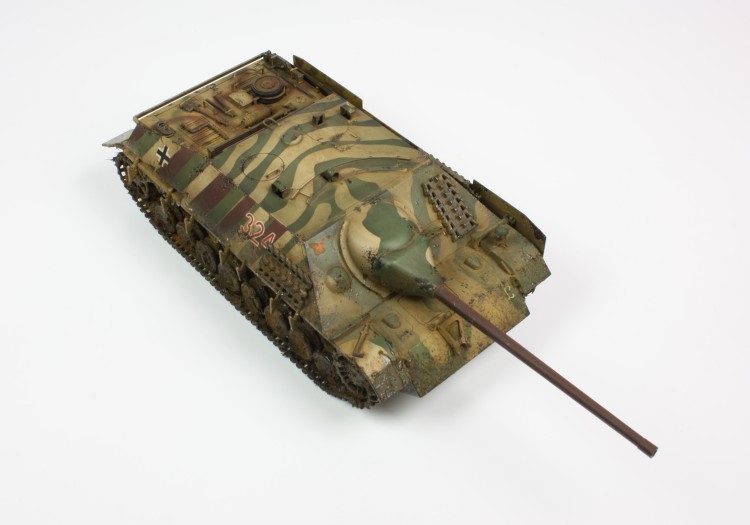
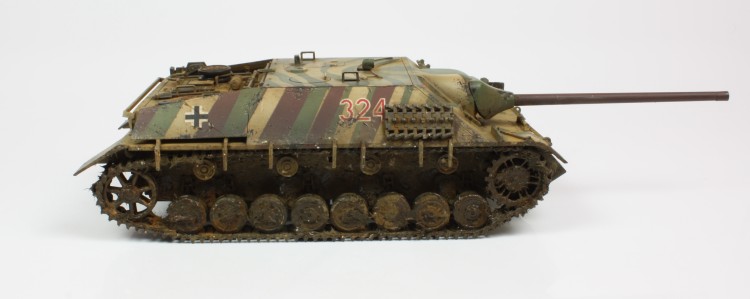
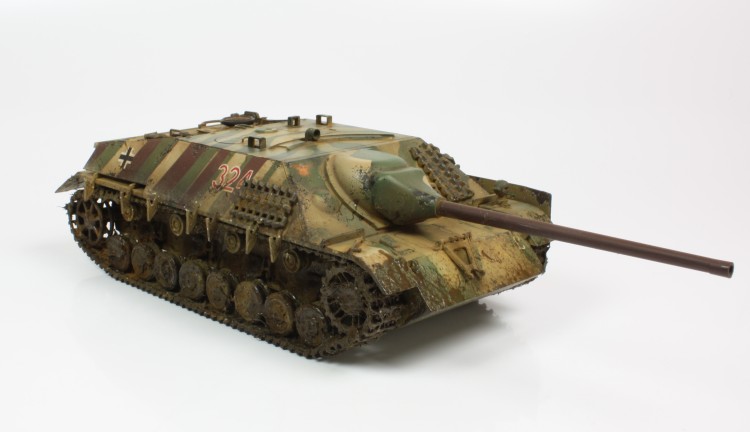
Colors we choose may vary depending on dirt effect we want to achieve. For darker toned, wet mud we will start with brighter colors. Dried mud, which we add at first, has a brighter color than wet and slimy fresh mud. With dirt, method is reversed, old dirt is toned and darker, set only in recesses, while fresh is much brighter. We must also take into consideration areas we are weathering. Fresh dirt probably won't occur in chassis recesses and dried mud won't be on top of our Jagdpanzer. Summarizing, lower parts of the vehicle will be dirty from mud and earth, while sides and top will mostly be covered in dirt only.
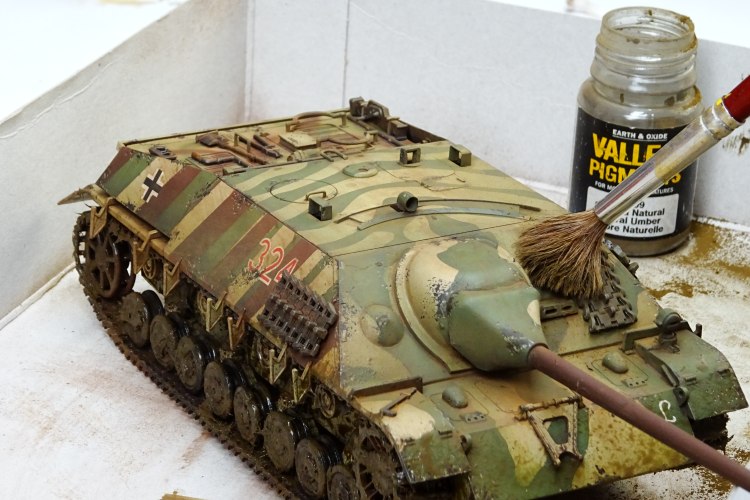
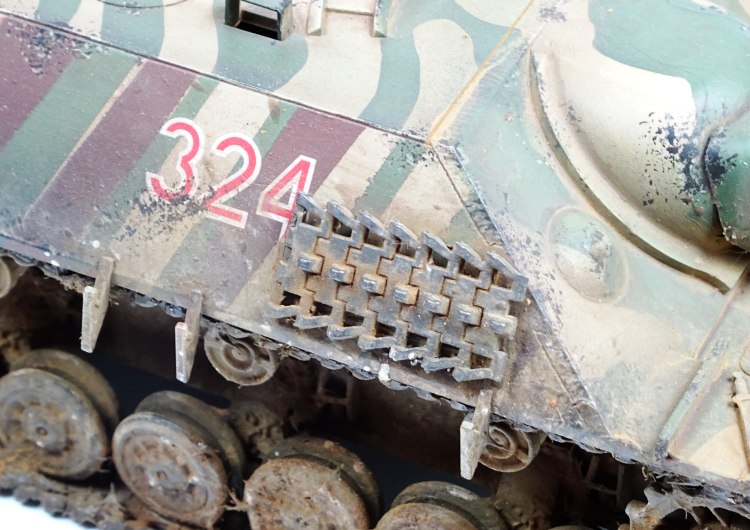
As for mud, we decided to create it only on tracks, wheels and chassis. Before we used some Vallejo effects to create structure on the dirtiest elements, now we will create some old, dried mud, to lighten it a little, and some new thinner spots of old dry mud. To create such effect, we simply mixed Vallejo Natural Umber (73.109) pigment with water and applied it with brush over almost all chassis, creating uneven spots. After drying, pigment created new layer of mud all over the area, giving our Jagdpanzer some “off road” battle-hardened look.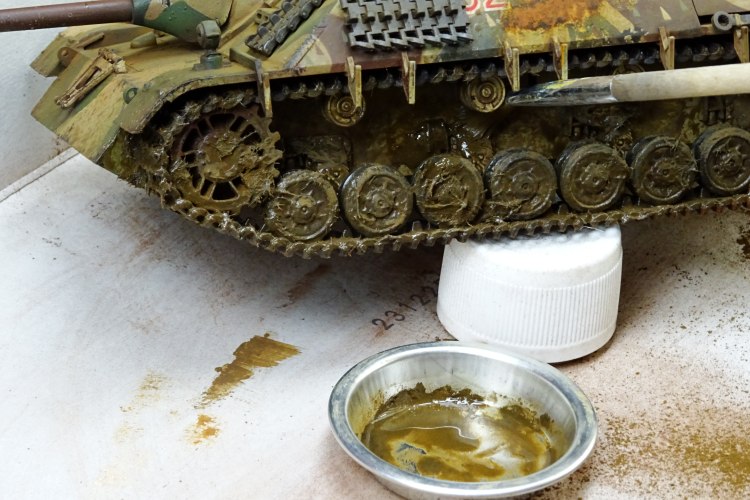
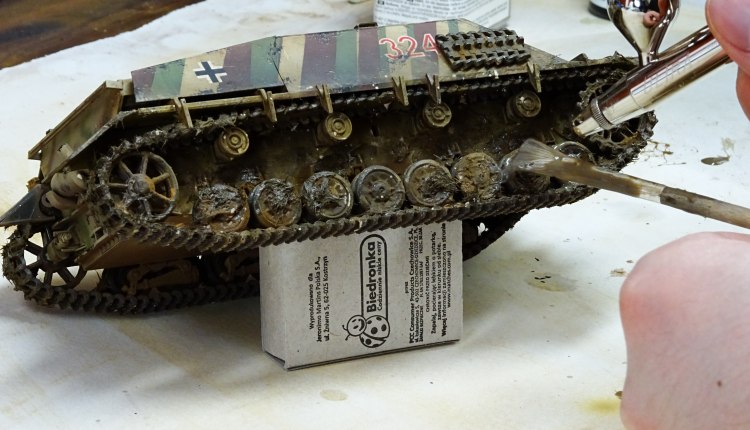
Next step in our weathering guide is the creation of road dirt on the armor of our tank destroyer. Now we will be using dry pigments (remember about that mask and ventilation!) to imitate dirt all over the vehicle. First, we added Vallejo Burnt Umber (73.110) on whole hull area, focusing mostly on recesses. We applied it with completely dry brush and rubbed it into all recess. Next, we removed excessive pigment with airbrush flow, but you can use a clean brush too. Next, we used a lighter shade of pigment, Natural Umber, in the same way.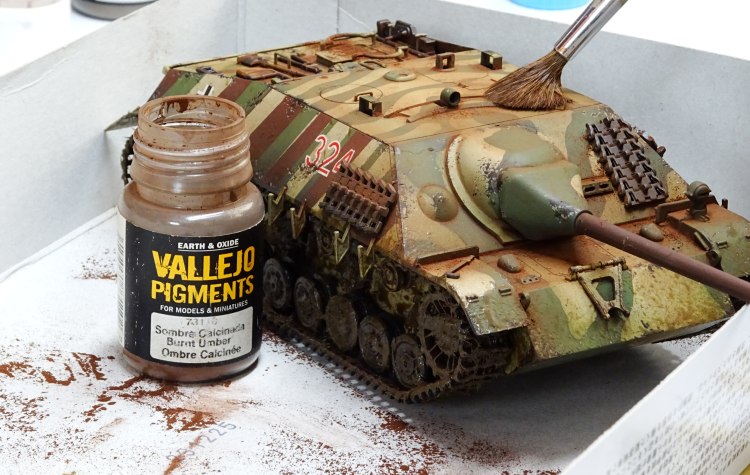
In the last step of dirtying our vehicle, we will add a large amount of fresh dirt on its surface. We apply Vallejo Natural Sienna (73.105) pigment with brush and airbrush, to create most dynamic effect possible. We flow the air on brush with pigment to give dirt coat some contrast. Now, that final layer will look like it's fresh and dropped on the vehicle minute before. The same method was used on chassis, as we sprayed pigment from the front of the model.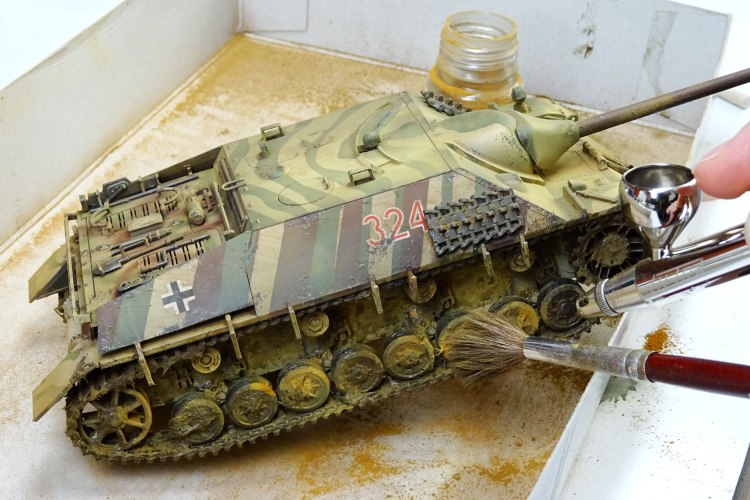
After we have finished with dirt, we decided to add few splashes of super light mud on the chassis. We used very watered down 1:1 mix of Desert Dust (73.121) and Natural Umber (73.109) pigments and splashed it irregularly with brush and finger on chassis and tracks. Remember to be gentle and frugal, as we only want few splashes of it on the most exposed areas. Now we have finished our work with pigments.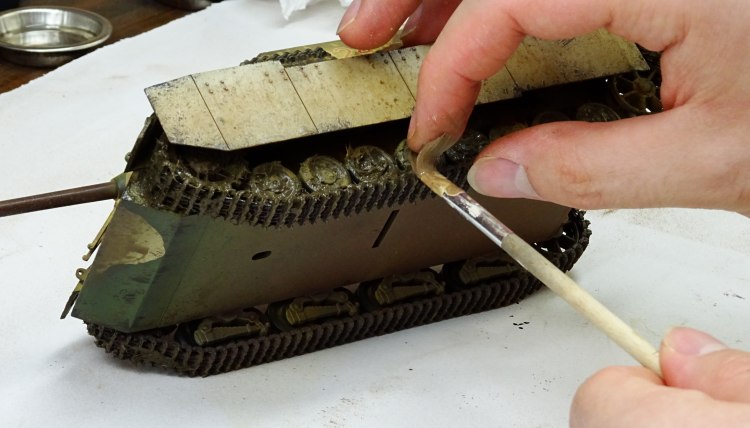
To finish weathering our model we decided to add some more effects, which we used before. Mud and grass are now base structure for our pigments mud, splashes are a little matted after dirtying the model. We have added a little of both in most exposed areas, thick mud with grass for chassis, and splashes for both chassis and hull.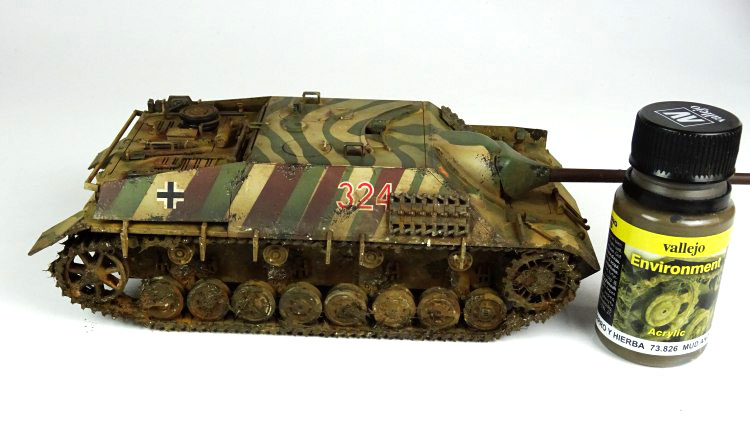
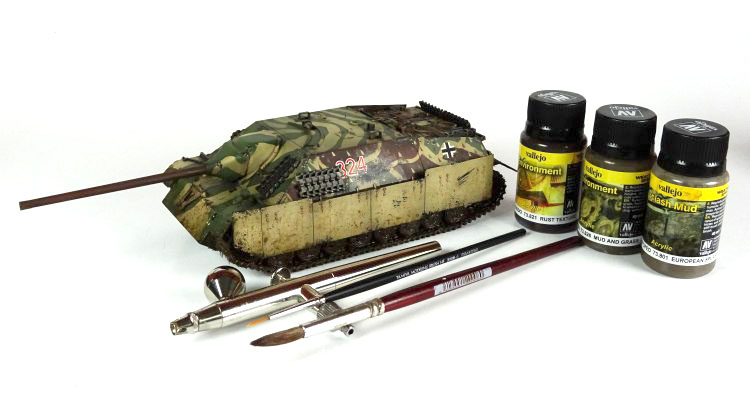
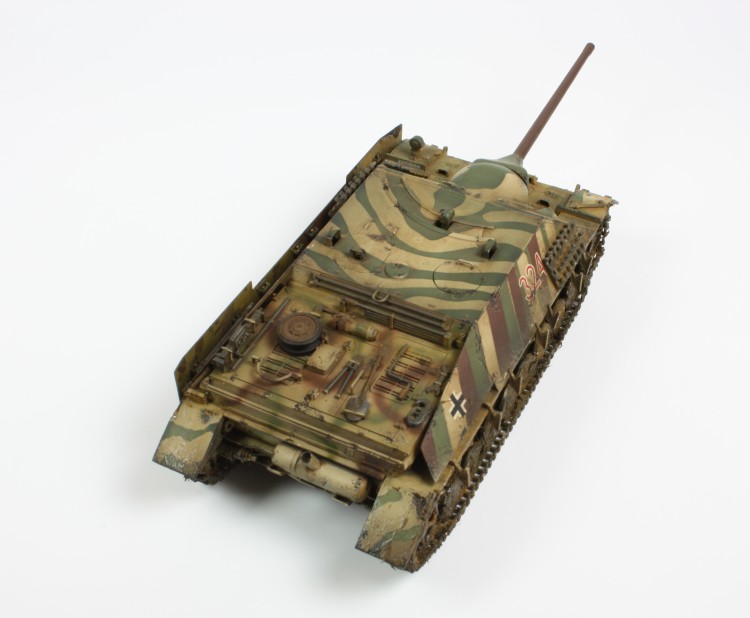
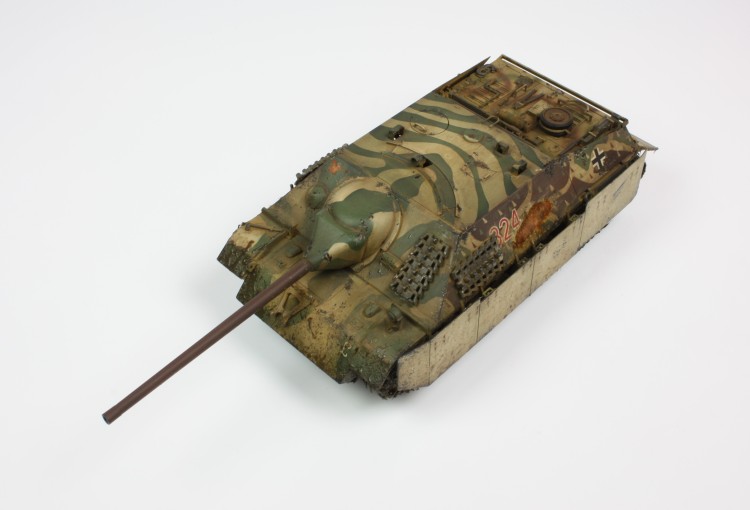
And now, our model is finally done. It's assembled, glued, painted, washed, pigments and effects are applied. You can now protect it with satin or matt varnish, but it isn't necessary. We didn't, our Jagdpanzer will be safe in one of our shop's cabinets.

We want to thank each and every one of you who read this series, thank yours for sharing and support. We hope you liked our guide and found it useful and it helped to improve your skills. If you were working along with us – we are most curious about the effect, please share your photos on our Facebook or send them via e-mail. If you have any suggestions, ideas for our next series, if you want to learn particular technique, find out how a product work – tell us, we might make such tutorial next.
Kind regards and happy painting from whole our crew!
